

I do a lot of research before I try new things. There are two ideas floating around right now that I really liked. One is Hugelkultur. The idea is basically a huge, permanent, water retaining, slow composting hill. This is a great site about it: http://www.richsoil.com/hugelkultur/ Down here, anything that saves water is welcome. The other idea I have seen around is Keyhole Gardens. These are used in Africa. It is way to farm otherwise unusable areas. Best explanation I have seen is in video format (I almost never watch videos but this one was worth it.) http://youtu.be/ykCXfjzfaco I also overcame my initial feeling that Hugelkultur was going to be too massive for a backyard garden with this lovely lady’s breakdown of the idea that she labeled “Half-Ass Hugelkultur”: http://www.nwedible.com/2012/03/half-ass-hugelkultur.html (I really get a kick from this gal’s site!) Anyway, I decided with my emphasis on site preparation (and my wonderful husband offering his back) that I would bridge the two ideas and create something that incorporated the best of both ideas. I wanted the slow breakdown of wood (I used bagged mulch. I could have found something free, but I didn’t. It was a simple and disease and insect free choice, plus I was still recovering from an illness. Easy was the only available route. I did almost nothing on this other than instruction from a chair and the photography. It was a wonderful Mother’s Day gift!)

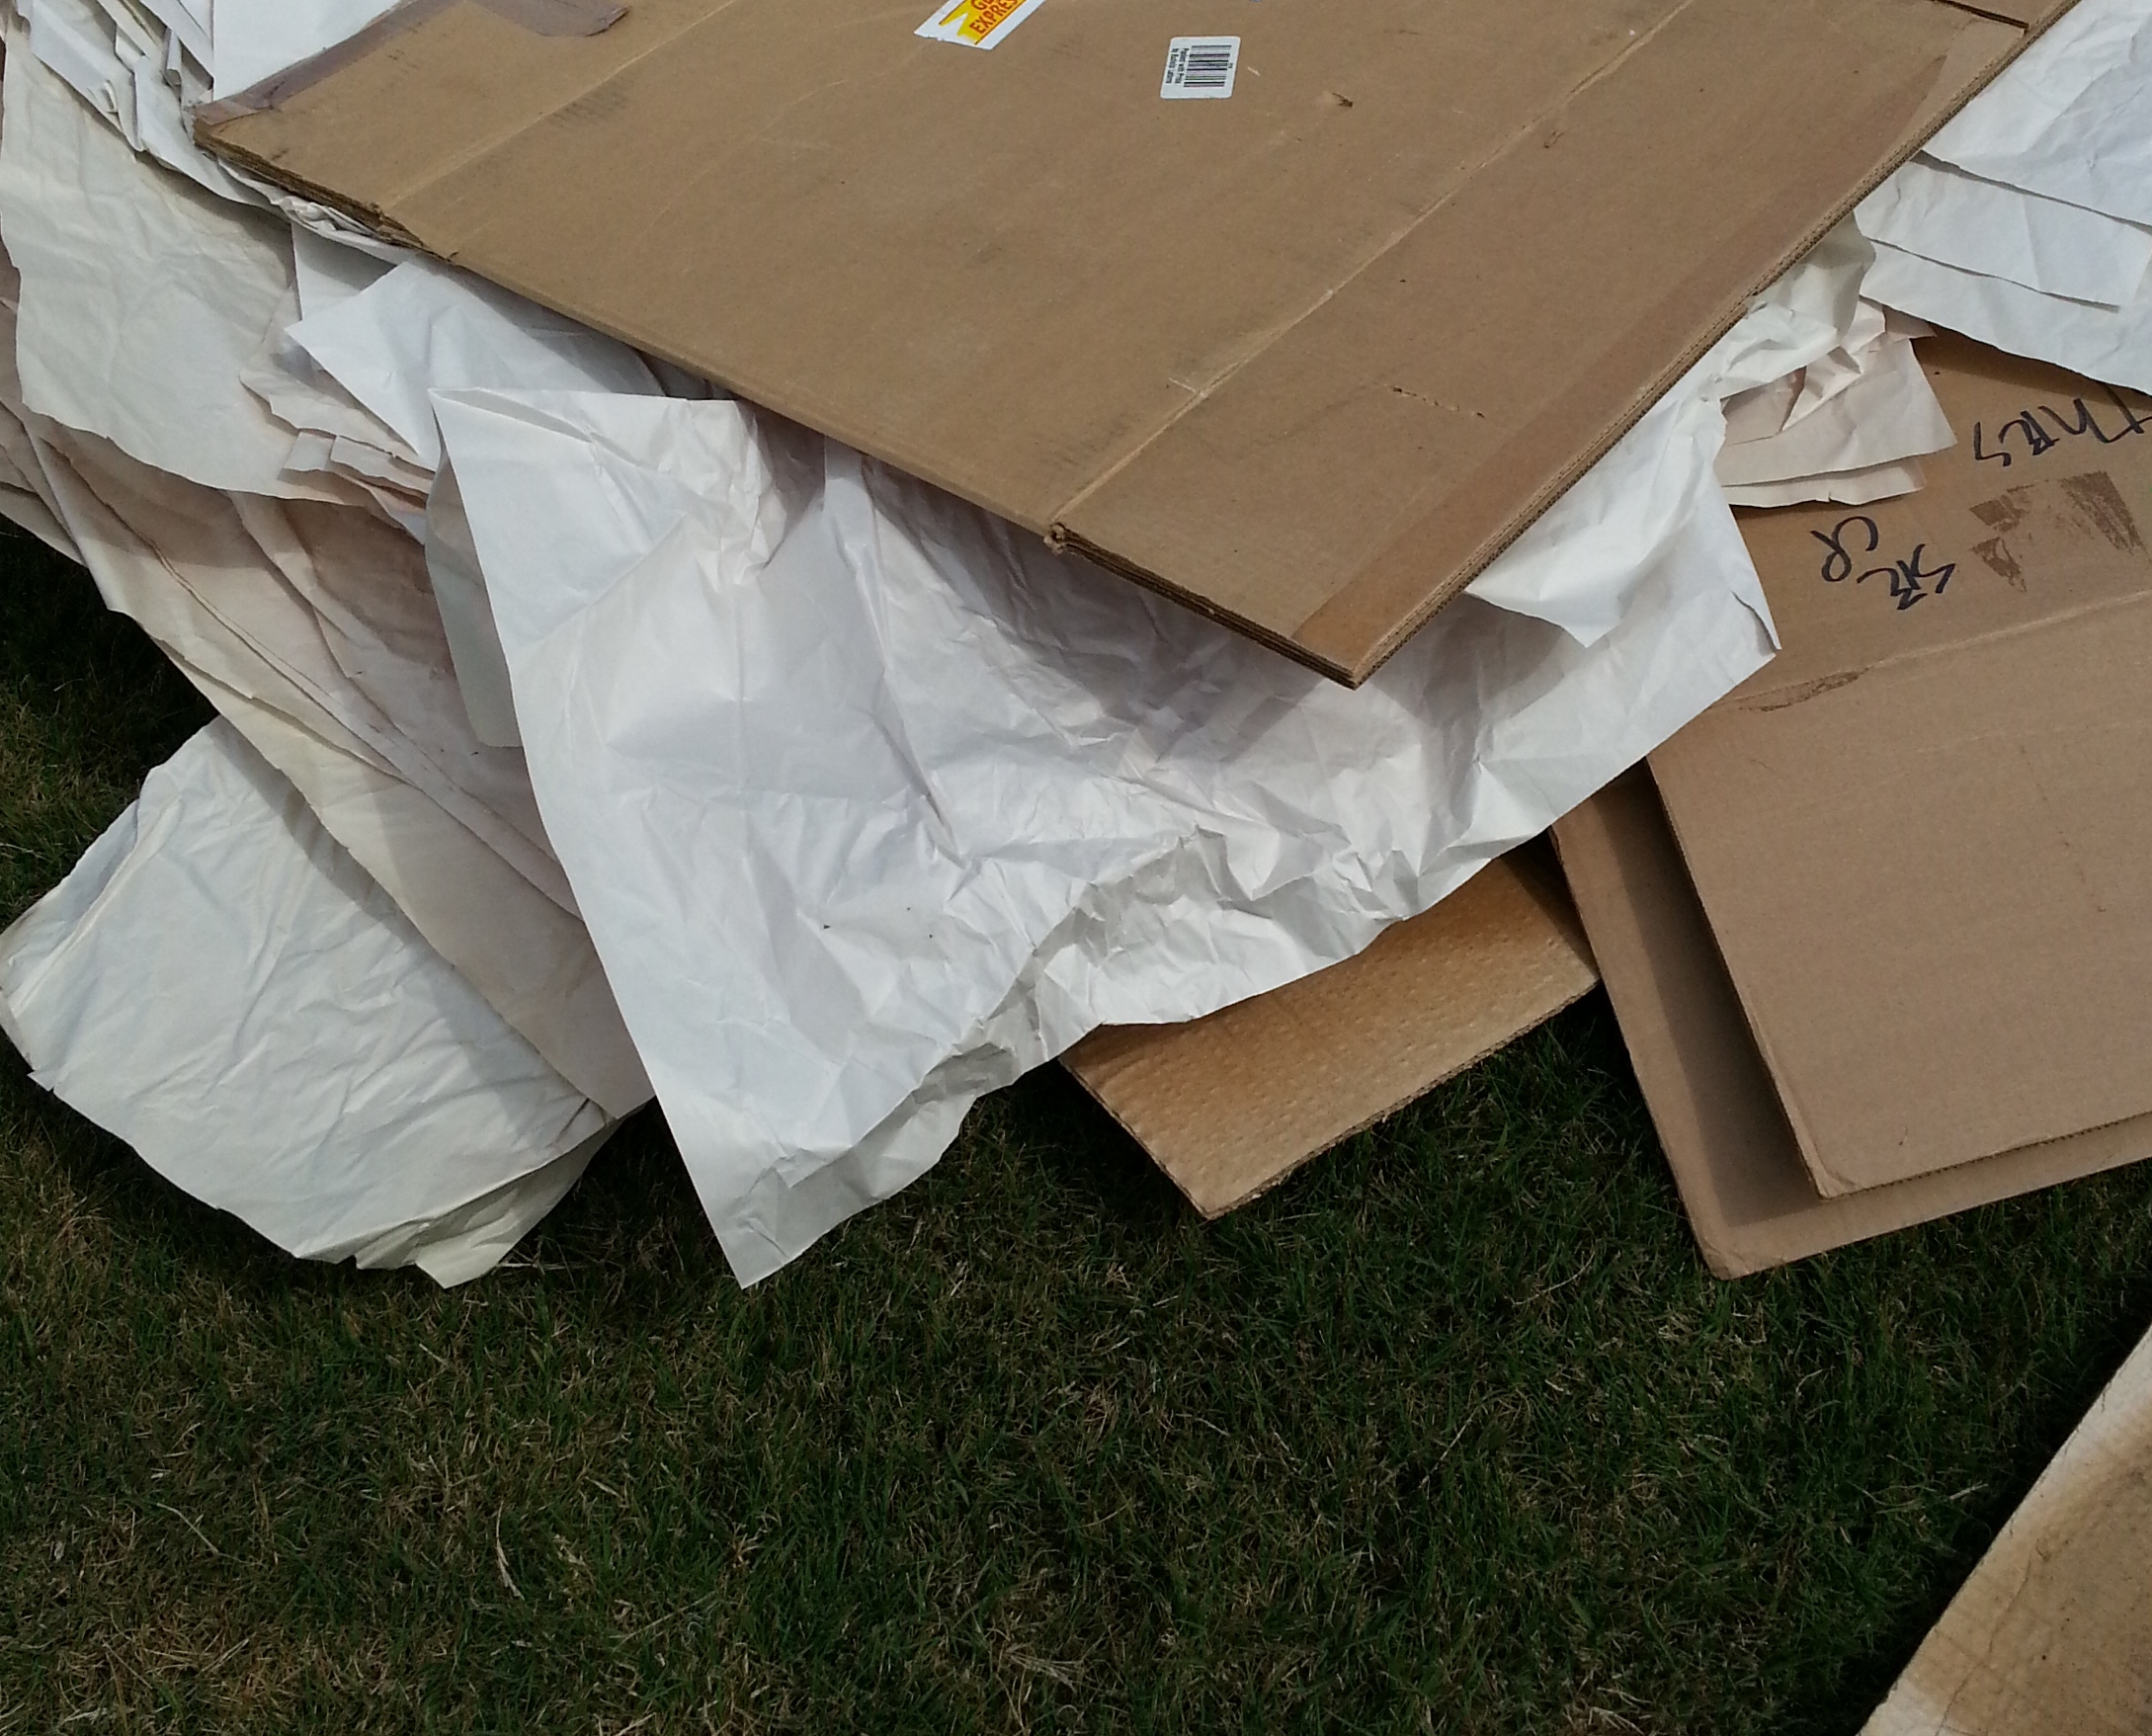
I had saved our packing materials from our last cross country move with this bed in mind.
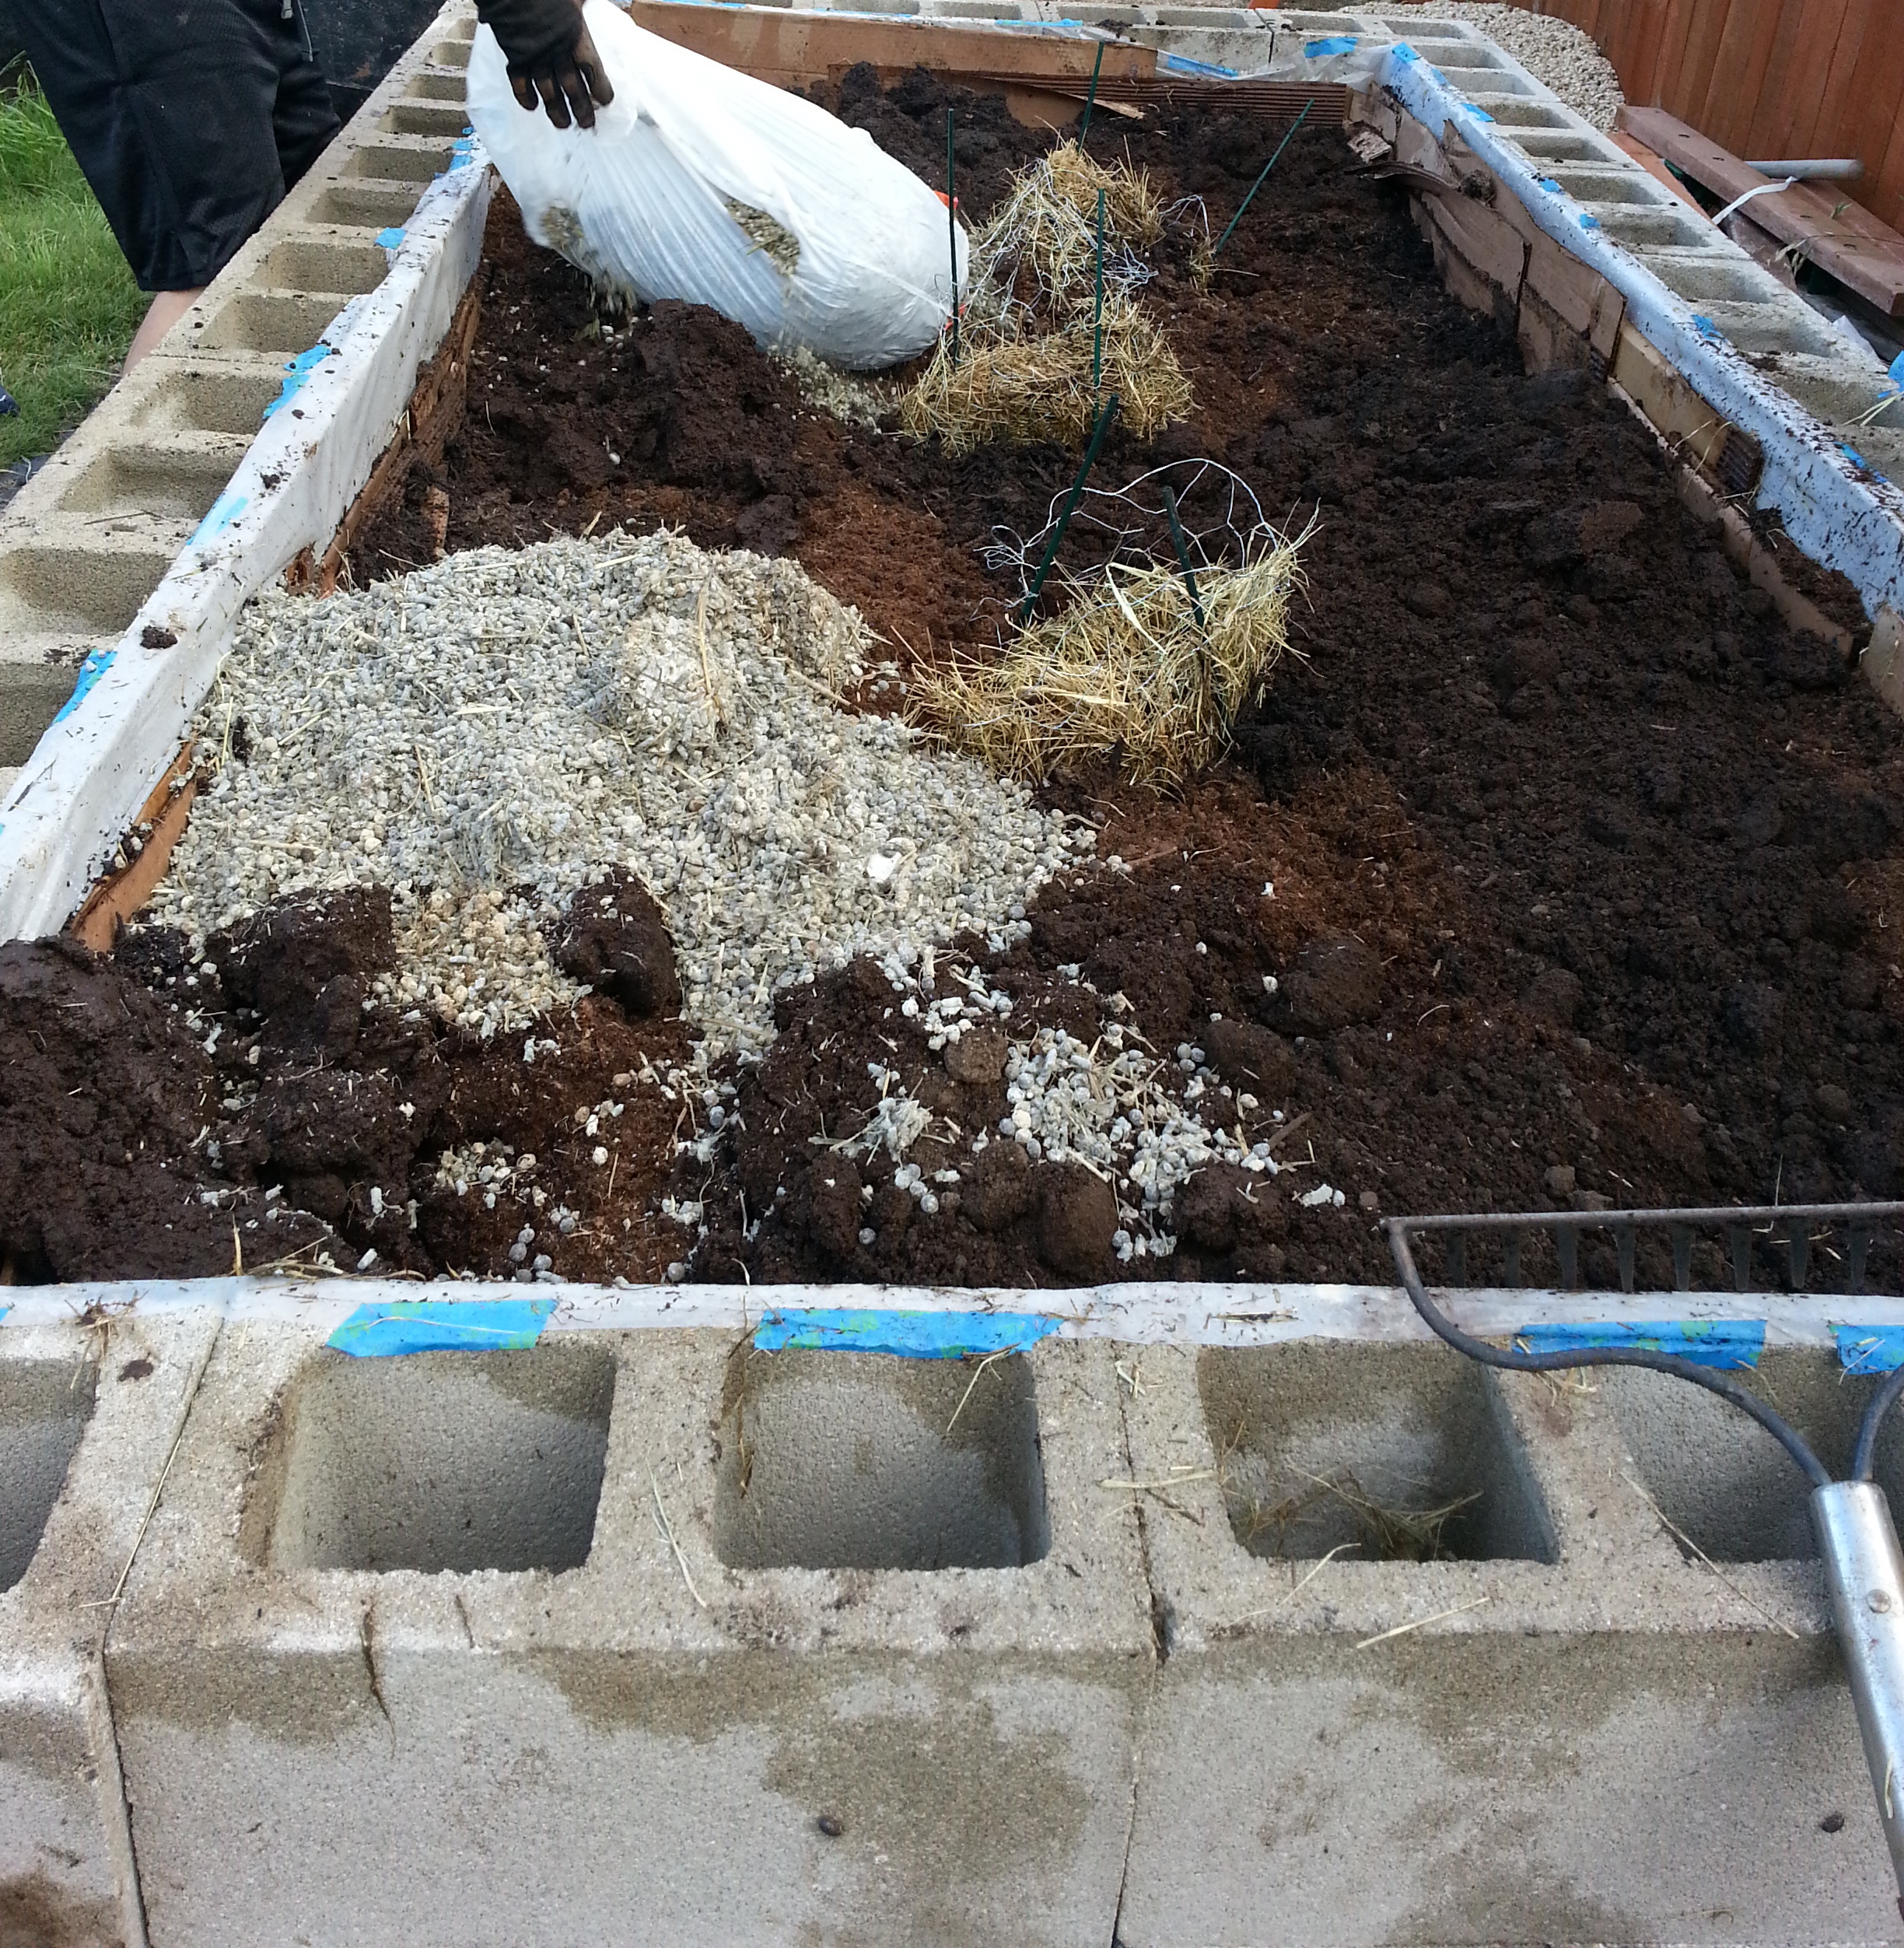
I also used rotted baled hay I had left over from another project.

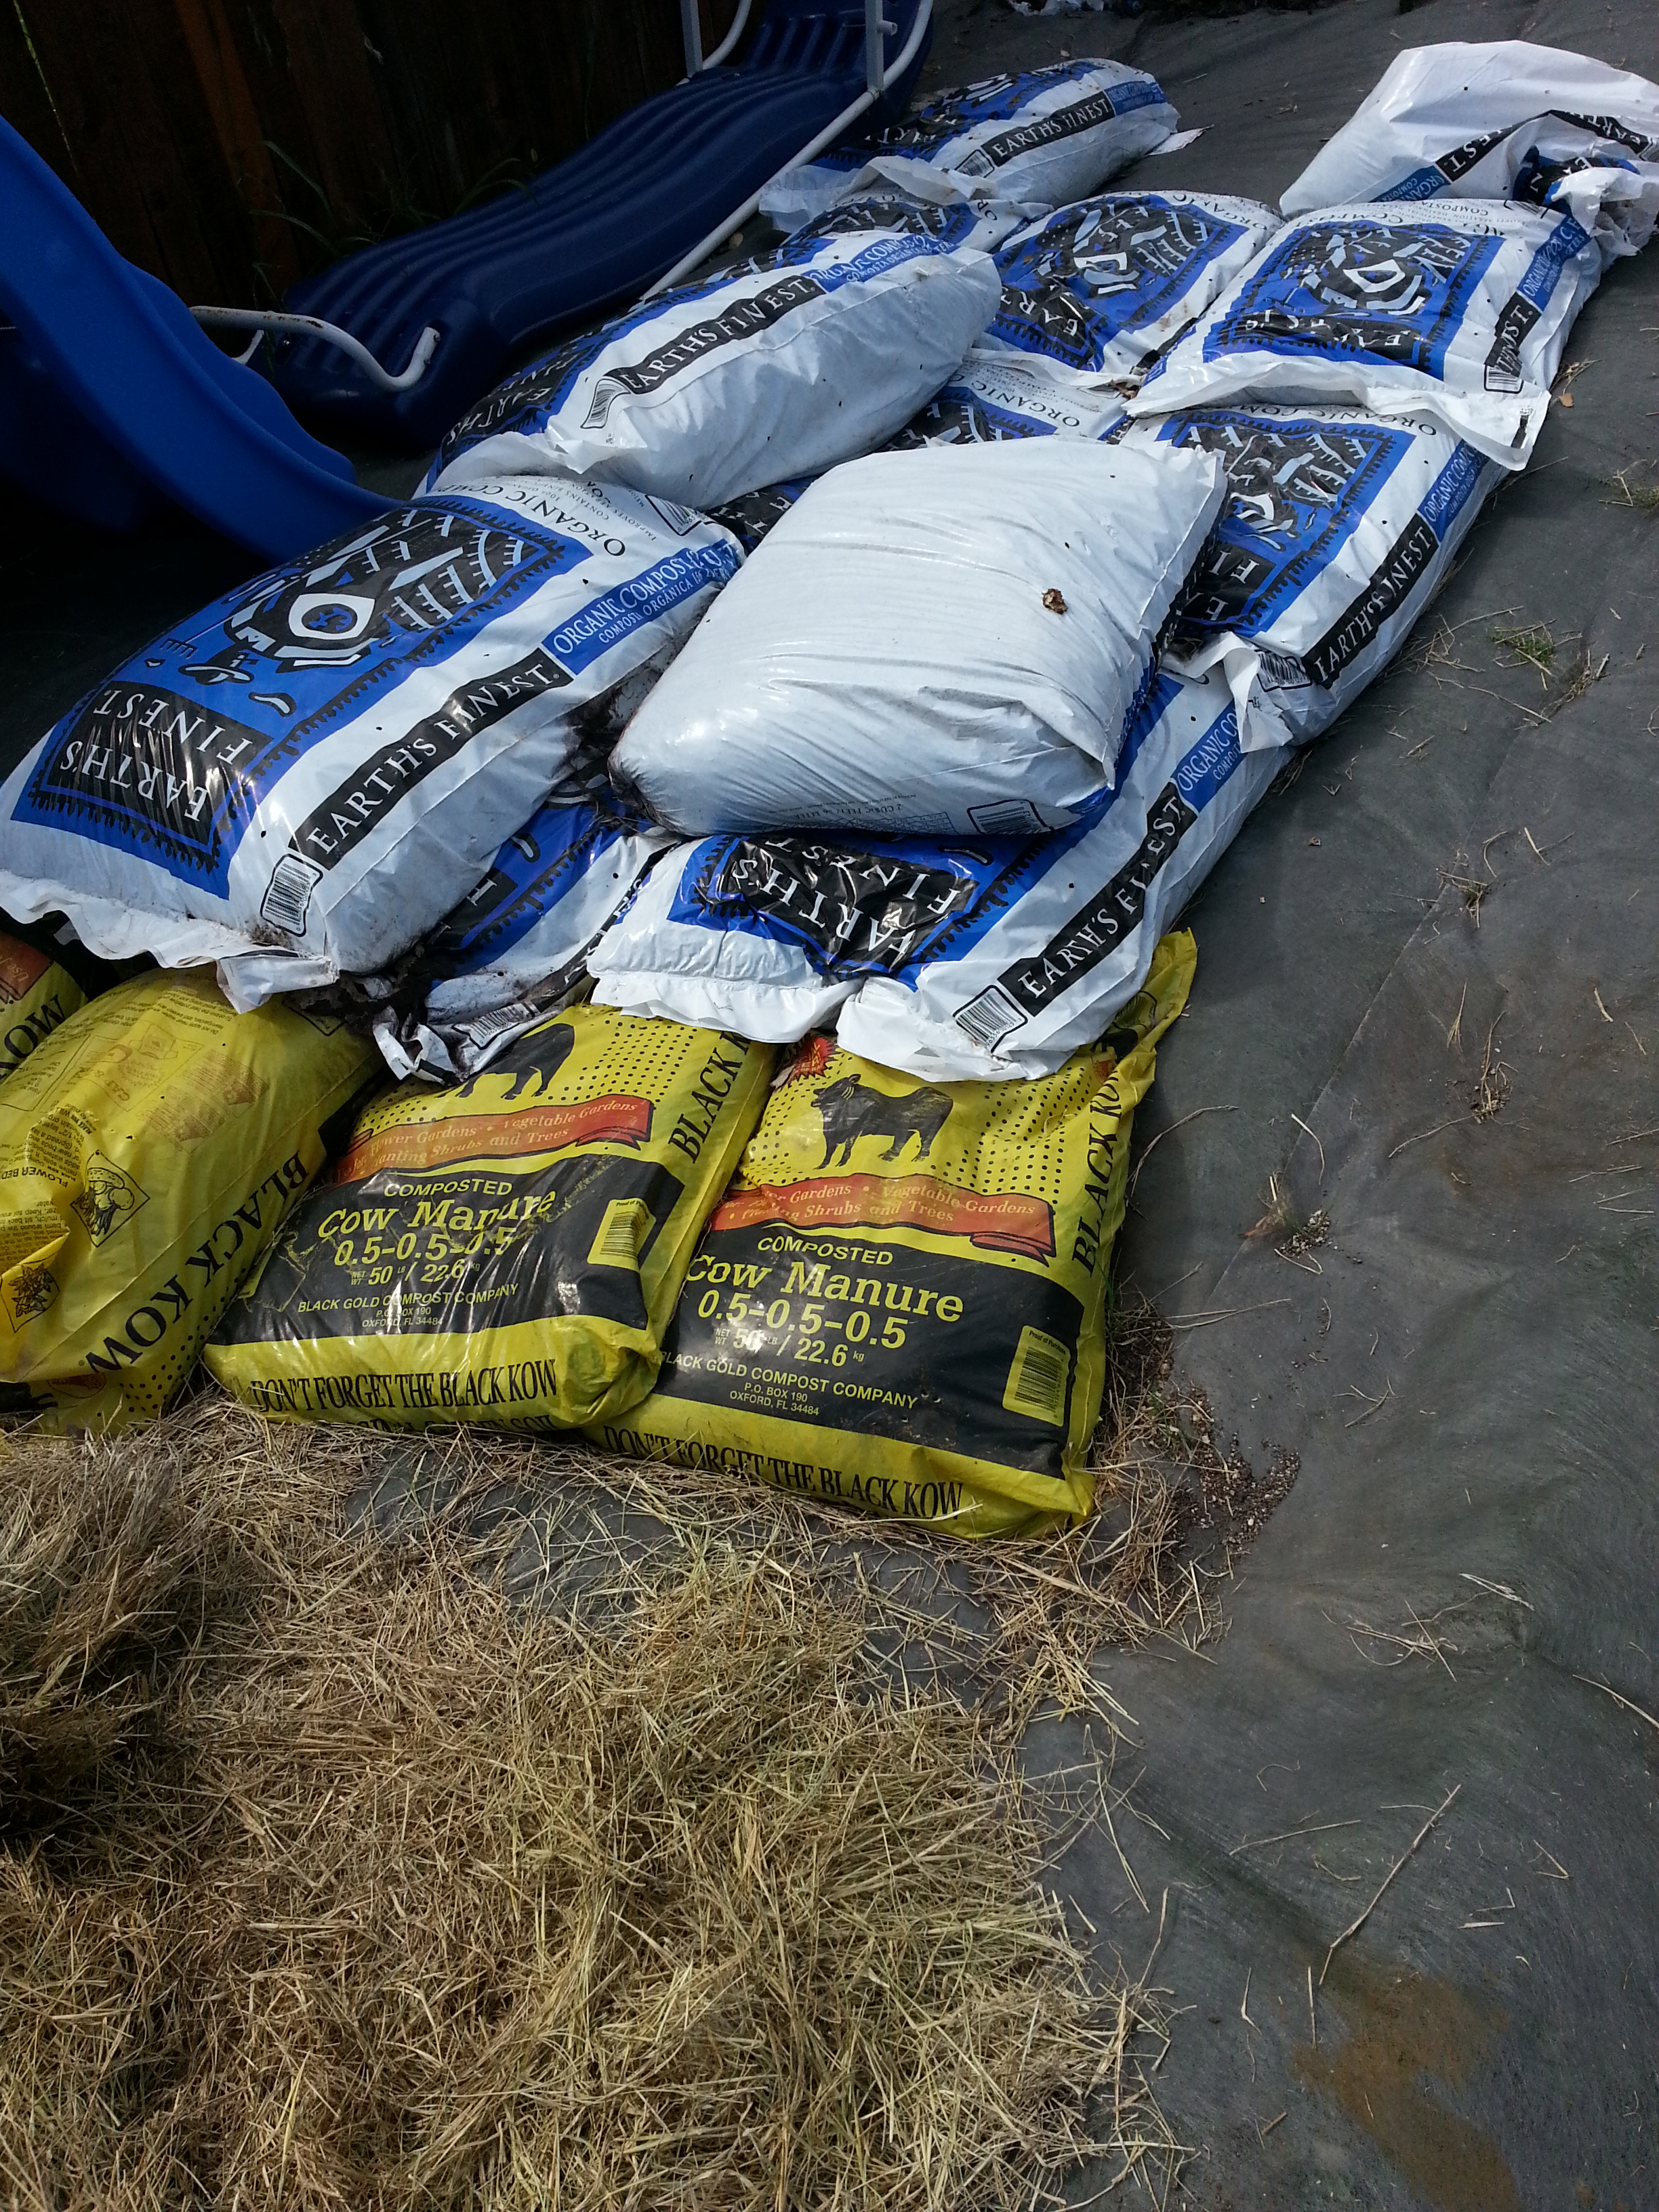
I used bagged soil and compost.
Most importantly I wanted to use the cheapest construction method I could find. I settled on cinder blocks. They are fast, cheap and pretty permanent. Since my husband lovingly volunteers to do the heavy labor, it was possible to use them.
We have evil Bermuda Grass (which I hate and wish I had never had the opportunity to try and deal with) so we sprayed roundup and laid landscape fabric over it. The cinder blocks are on top of the fabric. Like many of my projects this one started and stopped at random intervals. We got the cinder blocks down and I had some serious health issues that slowed our forward momentum. As the cinder blocks sat there I watched them wick water during the day. I soon realized these were going to make it a challenge to keep the bed wet. For better or for worse I decided to run plastic tarp around the inside of the cinder blocks. I taped the tarp down with painters tape to keep it up and out of the way as we worked.

Next came the lining of cardboard and packing paper.

I made wire cages to hold the hay and the future compost material from the kitchen. I estimated I needed three to keep the bed hydrated and fed equally. (Chicken wire is a hazard to work with but I always seem to be using it.)

We filled the beds with mulch and placed the cages.

Added a layer of hay and the soil and compost

Then with some help from my boy’s favorite pet:

Red, Red, Rabbit Head,
we mixed it rich with the expectations that the first season would be a rocky road: with the things that were composting drawing nitrogen and the soil not having enough adhesion to draw water effectively.

Despite the soil being new I have had a wonderful year. I have peanuts and Amaranth growing this summer and it has exceeded my expectations with it’s water retention…even in three digit heat. I love this bed, it will continue to bear the fruit of it’s (extensive) labor for a very long time with only minimal care from me. Thank you to all of the innovators who inspired me, and a very special thank you to: my husband and kids, for the best Mother’s Day ever!
Here’s an update! One year after building it the soil has settled and we were able to remove a course of the cinder blocks. We’re now building our second bed. Everything will be built the same. The only thing we will not use this year is the plastic. It really helped the original bed retain water down through the center of the bed, but has proven difficult to remove. I had originally planned on using much thicker ply plastic…but: “Do not look a gift horse in the mouth.” I love
this bed enough to duplicate it!

See the second completed bed and what we changed here: Mother’s Day Raised Hugelkultur Bed!

Looks good!
I like your design, I’ve got a pile of sticks out there and I’m not sure what to do next, I may just bury it somehow- I liked the idea of pining the pile with other sticks,that might work, or I have cardboard I could put over the top before I bury it, but then I wouldn’t have good access to the wood, I enjoyed reading your posts
Depending on how easy it is for you to dig into your soil, you can dig a trench to place the wood in. It will create a well that will help retain moisture. It doesn’t need to be very deep especially if you have clay soil and/or adequate yearly rainfall. I still need to water my beds but it’s much less often.
Wood takes a while to start breaking down. Once you get it to start the process of decaying: that’s when it will start to act like a large sponge. Soil will help get the wood consistently wet. Good luck!
Thanks for the follow! Have you posted about propagating cuttings from plants? I’d love to learn how to do that 🙂 Great blog!
Thanks for the idea! Rooting cuttings is a complex subject. There are several methods and they are recommended for different types of plants. The easiest way to accomplish this is by sticking something in a vase of water and seeing if it will root on it’s own. This doesn’t work for everything (it doesn’t work well for most woody plants) but it is the easiest method. I always have vases of things like ornamental potato vines (ipomoea) in the house. They are super easy to root. Other things like roses require more work to be successful. I will definitely work up an article that is more in depth.
Here are a couple of in depth explanations on propagation. This one has pictures and recommendations for what plants work best for each method: http://www.mastergardenproducts.com/gardenerscorner/new_page_4.htm
And this one specifically about air layering for hard to root plants. http://aggie-horticulture.tamu.edu/earthkind/landscape/air-layering/
This is a specialized horticultural field and is full of information. I can cover the basics but there are experts who will do a much better job explaining the specifics.
Very useful and creative ideas. Thank you.
You are welcome! I’m glad you liked them.
Glad you like my blog post!!! I have enjoyed reading all this. My problem is deer and bunnies so I only plant what they will not eat–lots of native flowers and grasses. I gave up on most veggies but they do not bother most herbs which are very drought resistant, e.g. thyme, Greek oregano.
I have a dog and cat that keep the rabbit’s out, but deer are a different story! I’m glad you have found some edibles that the wildlife will leave for you. Thank you for stopping by my blog!
Thanks for sharing this! We are building a hugelkultur bed in far north MN USA this year. Excited to see what we can grow in the short summer season. This is encouraging!