


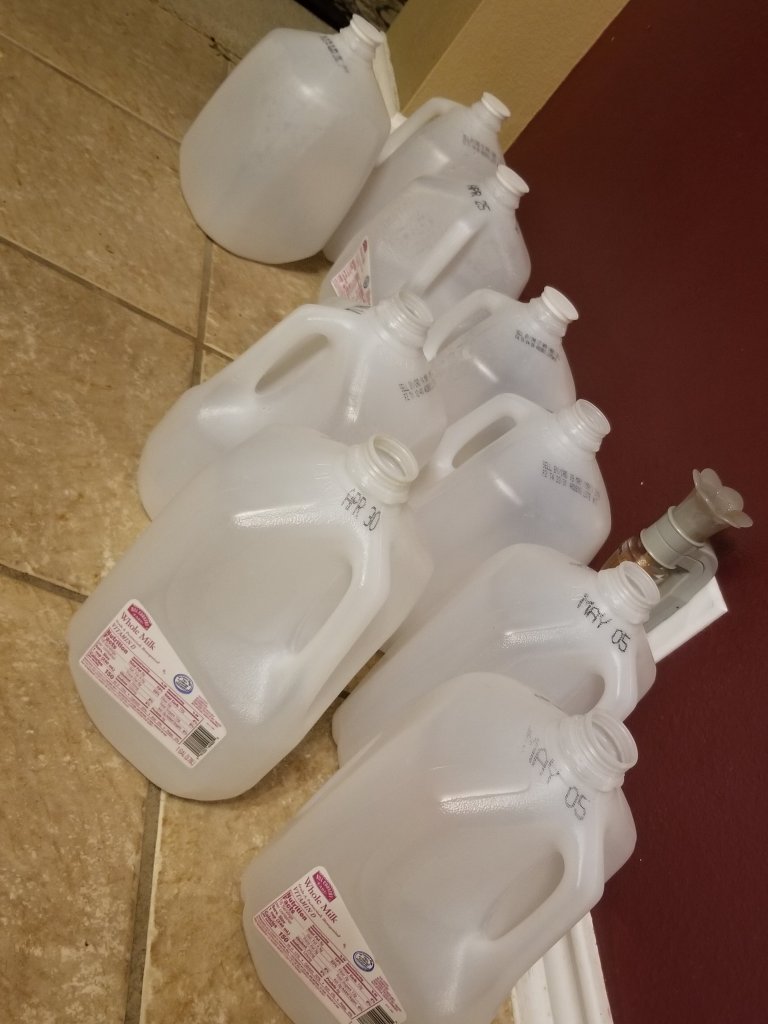
I love using milk jugs! My kids drink a lot of milk and we always have empty gallon milk containers. These are always useful in my garden! I use them to harden off transplants and in this blog entry: to keep tender plants (like tomatoes) outside, where they’re warm and have plenty of light, while I wait for my last frost date.

We tend to freeze around Thanksgiving and start our grow season around February 24 (So, we’re almost there!) That is a growing season of approximately 267 days, however we are not consistently frozen during winter. Most of our winter we keep climbing up into the 60s and 70s and frost and freezes are just peppered through that time. Also, my summers are hotter than Hades (and are super difficult to grow through). I can grow cool weather crops through the winter. I consider summer more of the down time and my winter just needs some supplemental watering.
Since I live in South Central Texas: my winters are super short. We go years without a single flake of snow (and when we do get snow it never sticks…. Until 2021, our crazy year, when we got a foot of snow and a week in the teens. But that was seriously unusual.) We aren’t always frost free, but this year none of my tropical plants have frozen back. Even my tropical hibiscus are still green. (This was the case before the year with the big freeze with the snow, too. I moved my tropical plants inside and they’re still going strong.)
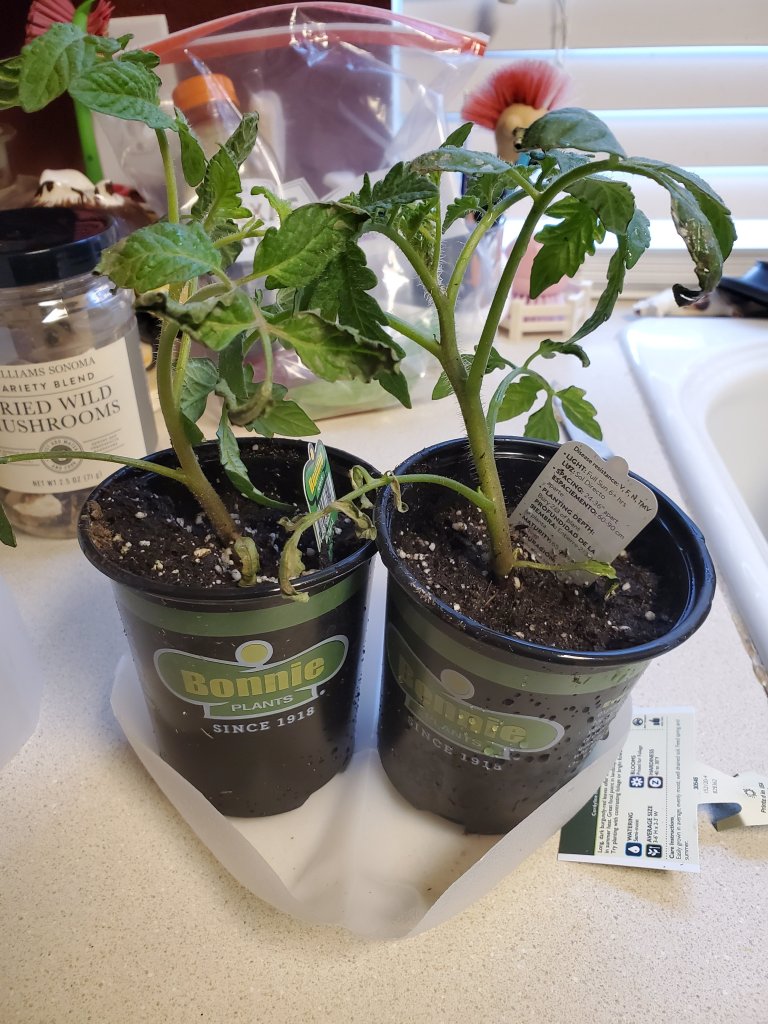
But, seedlings are more tender, and require a little more protection. So the tomatoes I just bought at Lowe’s are now happily seated outside in their own little milk jug greenhouses, protected from chilly temperatures at night.
If you have a family who drinks milk, you can easily save your gallon jugs by nearly cutting off the bottom of the jug and nesting them inside each other. Like this:
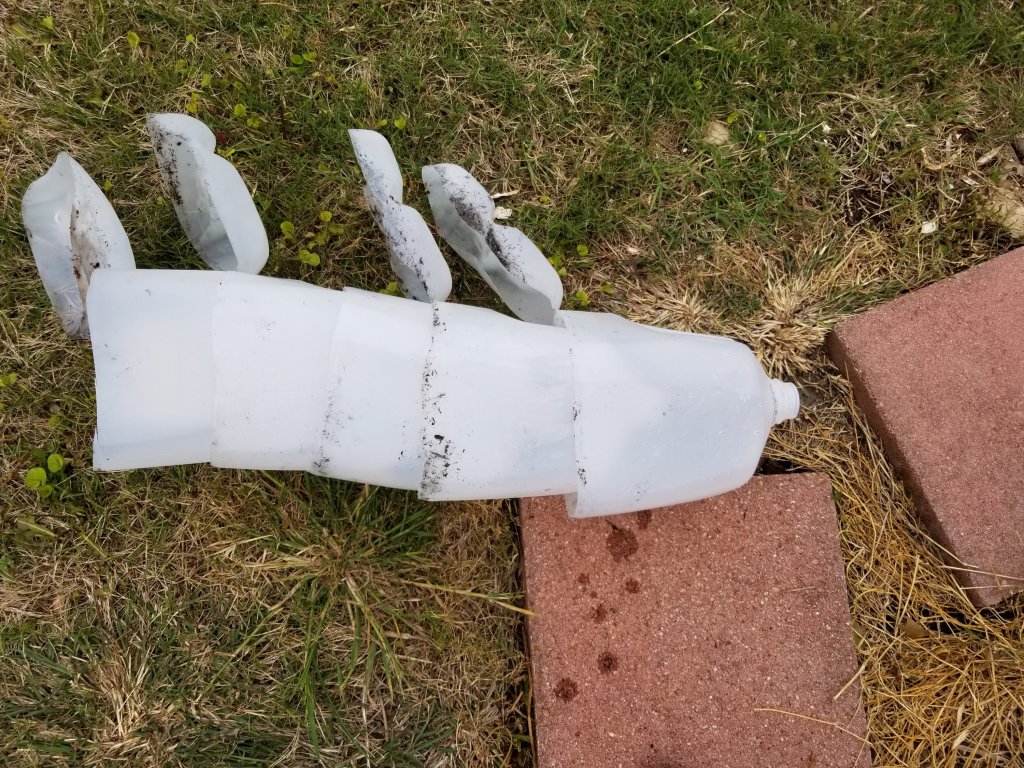
To create a mini, milk jug greenhouse cut through the base leaving a small area attached under the handle. Carefully place your seedlings in the base. If they are too tall, then you can cut the base completely off and cover the space in between with duct tape. Either with the base attached, or without, run duct tape around the bottom of the jug and reattach the bottom to the top of the jug. You can extend the jug as tall as you need, within reason. I always keep the caps and put them on before I put the jugs outside in bright shade. This keeps any creepy crawlies from finding their way into the jug and infesting the plants.

If you have freezing nights, these can easily be picked up and brought back inside. I would be careful with the jugs. While they will definitely extend the time you can have your plants outdoors, they are not miracle workers. Depending on what you have in these, you can have some spring vegetables sprouting a couple of weeks early or have your tender summer tomatoes protected until its time to think about planting them. If you have long periods of time that are below freezing I would move them back indoors. For tender summer vegetables bring them in if it’s below 35 degrees Fahrenheit outside.

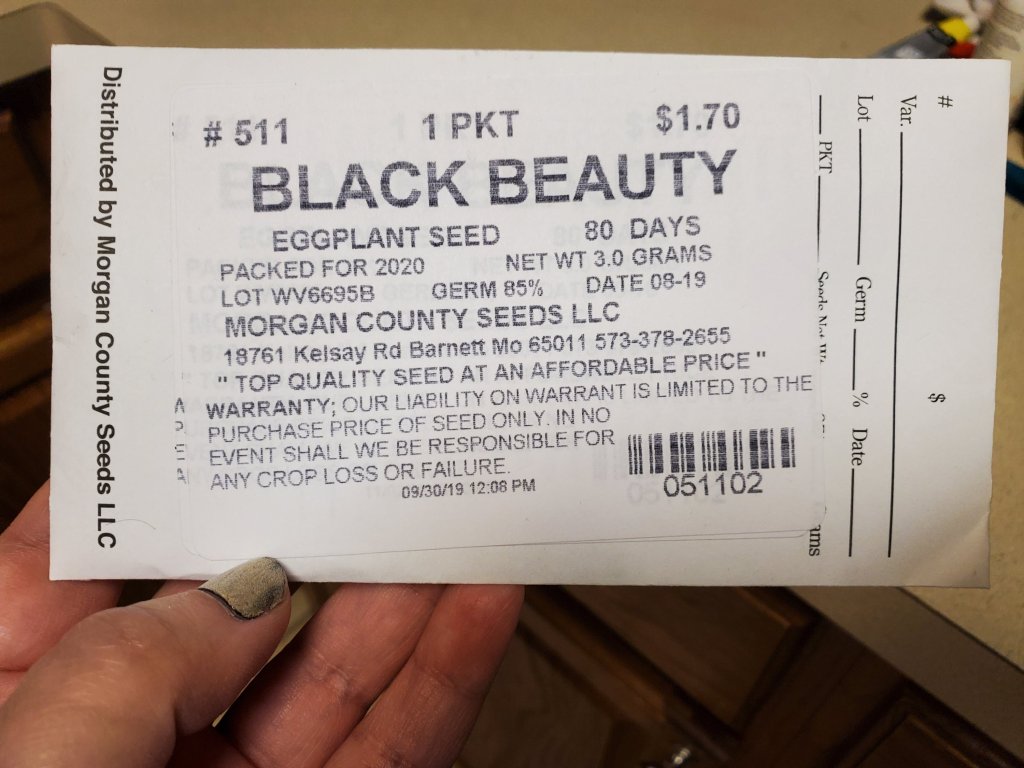
I don’t want to spend $50, $80 or $100 on seed every year. I have never found a better seed purveyor than Morgan County Seeds. I’ve used them for over twenty years, across the two different states (that I’ve lived in during that time.) I never get a packet from them and get heartburn over the amount of seed or the germination rates. As far as I know they are the cheapest, best source for seed. (BTW I am not financially aligned with this company, I just really like them.)

Get outside and get growing! Let me know how you do with your milk jug greenhouses in the comment section! I’d love to see your garden!
Discover more from Crazy Green Thumbs
Subscribe to get the latest posts sent to your email.

Oh, I should have used something like this for cuttings last winter. I suspect that some might have done better if with a bit more synthetic humidity. I lack access to such items, but can get comparable or even better items from the big kitchen at work.
I really enjoy how easy this makes hardening off or keeping seedlings warm at night. As long as your containers are sturdy enough to hold everything and easy enough to cut through, I think you’d like this set up. Nice to see you!
They are bigger than these, and not too difficult to cut through. I do not like to admit that they could be useful, but, as you can imagine, minimal humidity can be a concern when a bit more humidity is needed.