


Oh, I love my milk jugs! I start my seeds in them. I root cuttings in them. I short cut the hardening-off process with them.

Yes! That’s right you can now be lazy like me and get past the long and annoying process of getting plants into your garden. Hardening off plants is necessary but I hate it. It requires patience, planning and organization. I am not good at any of those. Moving a plant from indoor light to your outdoor location (especially in full sun) without having the plant sunburn and suffer from wind burn takes more effort than I enjoy using for a seedling: out in the shade, back in the house, in the shade, in the sun…moving trays of plants ad nauseum.

Granted I don’t have acres of garden area to deal with, but I have enough plants hardening off at the same time that I was on the lookout for an easier way to do it.

Enter the milk jugs. Luckily for me I have some major milk drinking kids (Okay, I admit it. I am, too) and I always have gallon jugs. The nice thing about milk jugs is they are semi-opaque. They keep the sun down to a reasonable level, keep the wind at bay and let the transplanted seedling establish itself. Just cut the base off and you’re good to go. You will need to raise the jugs to water.
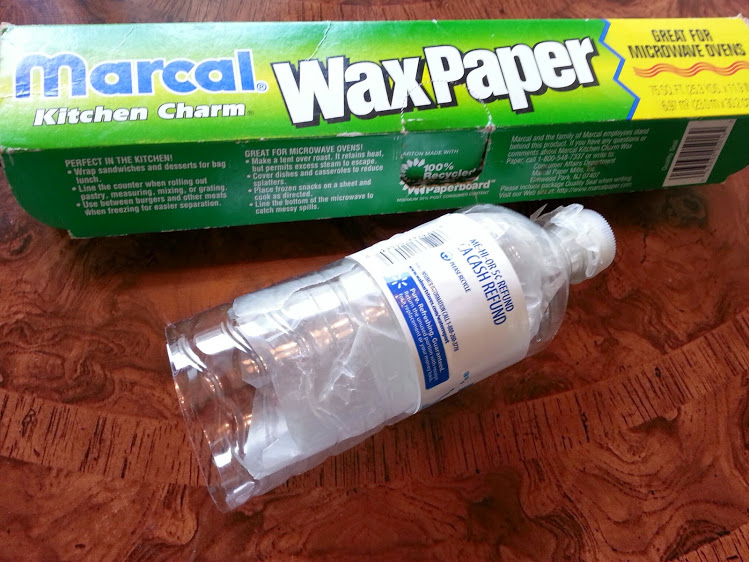
I am also using water bottles with some parchment paper or wax paper run inside it and vents cut around individual seedlings for a few days. The water bottles will only allow a small plant. You could probably use it on any nightshade family plant that starts off looking like a pepper seedling (including: tomatillo, peppers, husk cherry, garden huckleberry.) If we drank pop: I would also be using two liter bottles with the parchment/wax paper. I use what we have, therefore: I use milk jugs (and well rinsed out vinegar jugs when I get an empty.)
Run a stick next to your transplanted seedling to hold bottles in place. I’m only using water bottles because I don’t have thirty milk jugs hanging out to cover everything. Like I said: I use what I have. I’m certainly saving more jugs for next year!!! Go ahead and cut some vents in any clear container you are putting paper in. All of the covers will need to vent or you will cook the plants.

Next: nestle the jug or bottle into the soil. If you live in a windy area like I do, run some chicken wire over your bed (flatten it out first.) The chicken wire and your stick you ran down the center of the bottles will hold the jugs and bottles in place. Do not put the caps back on. I also put some iron based natural snail bait down because I was getting holes on the plants overnight. Slugs and snails are sneaky!!!

Don’t let them dry out, keep them watered daily until they establish. Leave the small ones on for several days, the jugs up to a week. You can then make a judgement call when you think they will make it without the cover. You are looking for things like: solid growth, no major wilting and generally healthy, happy seedlings. You can pop these on and off during the day/night for a few days before you are ready to remove them for good. This will get the plants past wind burn and sunburn. Look at what you are dealing with weather-wise and try to remove the covers permanently on a calm/cloudy/wet day or when you will experience lower temperatures. You could certainly use row cover to do the same thing, but I prefer the milk jugs (I’m now addicted! Good thing I love milk!)
I could deal with row cover (which really isn’t much different, but here are the cons:) Row cover falls apart quickly, gets full of debris, can blow off and into your neighbors yard with enough wind (the winds in Colorado would blow so hard the row cover would rip away from the landscape pins!) some seasons I can find it easily, other seasons it’s a huge search that results in serious frustration and a purchase online, lastly: I bleach most things I reuse between seasons to cut down on fungal spores. Alternatively: I can store a bunch of milk jugs in my garage every winter and use them for years! Quicker, easier, already on hand…the jugs have my vote!
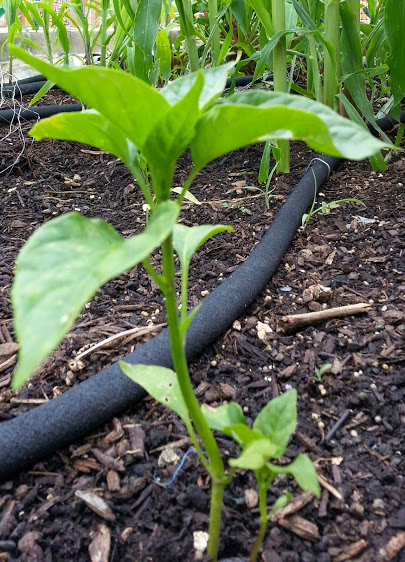
My peppers made the transition beautifully! I love shortcuts that work!
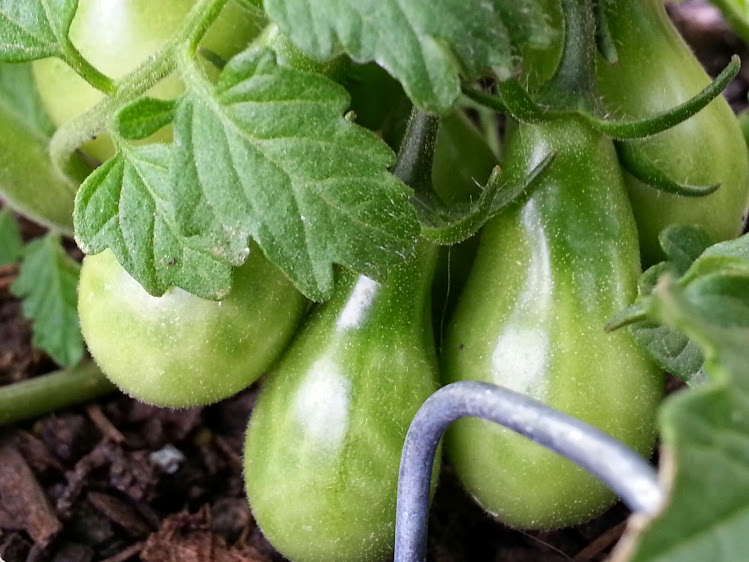
Since I’m enjoying my garden so much this year, I thought I’d throw in some random photos from this week:


Get updates on this blog via Facebook here: www.facebook.com/CrazyGreenThumbs
Discover more from Crazy Green Thumbs
Subscribe to get the latest posts sent to your email.

I grow chard year round inside my house in a large pot. Snip them off when I want some and wait a bit and they grow back. Tried outside in the summer but the heat here seems too much for them. Works great inside in a deep south window.
I have mine where they are sheltered from afternoon sun. It gets hot here in South Texas, but afternoon shade and plenty of water keeps these guys going strong. I’m zone 8b/9a, near San Antonio. You are quite a bit north of us, I suspect the weather is much drier where you are. Thank you so much for coming by. My best friends are always teachers!
Love the milk jugs idea- I, too am a milk drinker- this is a wonderful way to reuse the bottles instead of sending them off to recycling. Looks like your having a lot of success in your garden 🙂
The most comprehensive gardening articles I have written were the early ones. Check out my tab at the top: gardening basics. If you want to know how to grow, it’s everything I could think of to share. Good luck, and thanks for coming by!
Your vegetable garden looks wonderfull. It has changed over night at least it seems that way. Good luck on spring gardening!
Honey
It did seem to take off overnight this year! Thank you for coming by. I always appreciate your comments.
Very useful tip–thank you! In the north east we get frosts potentially up through Memorial Day, so this will be very useful for my tender plants.
Keep the caps on for freezing weather. They are great,cheap cloches! Good luck with your spring planting!
Great ideas especially the parchment paper. I reuse large juice bottles.
Thank you for the tip. Juice bottles would definitely work too! Thanks for stopping by and sharing. I appreciate it!
Absolutely creative and inexpensive way to reuse and recycle something for a tremendously wonderful purpose! Love it!
Thank you! I’m glad you liked it. Thanks for stopping by. I appreciate it!
My pleasure 🙂
hi and nice meeting you 🙂 love the way you use the jugs , i been doing the same only mine are clear not opaque.. it worked well for the vine and i plan doing same for my tomato seedlings 🙂 when i plant them in the garden which is gonna be the followeing days ,also i come with a suggestion for you to get the extra jugs needed from rrestaurants or places that use milk 🙂 just a thought 🙂 theres plenty of stuff to recycle esp the plastic buckets they use for ketchup and stuff . 🙂
Thanks for the ideas! I’m glad you enjoyed the post. Thank you for taking the time to comment. I appreciate it.
you’re so welcome 🙂 i love gardens and i have a green thumb myself 🙂 will put it on display in my future blog posts 😀
I use milk cartons (plastic or card depending on where it’s from) to raise seedlings in. I too am lazy with hardening off but as I mostly grow my veggies on my balcony it gets a combination of sun and shade. Wind burn I’m assuming is the wilting of plants due to them not used to being out in the air? I solved this by having all my seed pots – nice square 2 litre cut down milk cartons) which conveniently fit in the ‘grow bag trays’ I have – and covering lightly with bubble wrap. Insulates them and provides some protection from the sun. + gradually let air in by opening it up or leaving a gap in it after watering…. Although I live in the UK so the sun burning the seedlings is less of a problem here hehe 🙂
I am going to give your idea a try tomorrow though as I have some gherkin and squash plants I’m desperate to plant out as they’re growing at a rate of knots and they aren’t hardened off quite yet. I have kept all the top parts to my milk ‘pots’ just in case… they also make for handy labels 🙂
Bubble wrap is a great idea! We get some every month in packages. Now I have a reason to keep it. Thanks!
No worries! Has kept my chilli seedlings going outside in a UK spring although the aphids are starting to come out to play *sneer* which reminds me I must buy some new pets to take care of this (ladybird larvae :D)
Be sure to take the bubble wrap off if in direct sun and it warms up – the sun super heats the little clear air pockets and can over-heat your plants…someone tried to warn me and I didn’t listen. Sigh.
Brilliant idea re the milk jugs… I will definitely do this, as I really dislike the hardening off process, too. Just need to start saving those bottles (been using them to keep rain water so far).
Thank you! It just seemed natural to get them out there to establish themselves instead of repeatedly bringing them in and out of the house. I’m glad you liked it! Thank you so much for stopping by.
🙂
What a creative way to harden off tender seedlings! I am not a milk drinker but found that clear plastic cups (leftover from a party) made good covers for my variety of peppers..I cut a slit in the top and use a rock on top to keep them from blowing away.
Great idea! I like milk jugs because they have such a large interior, but anything that helps stop desiccation from wind and sun would do the same job. Thank you for sharing your solution! I appreciate it.
great and timely article. We’re just moving our seedlings outside, wondering how to harden them off, so this will really help, thanks!
Good luck! Thank you for coming by and commenting!
Great idea!!
Thank you!
I enjoy your entertaining and informative dialog on gardening. My wife and I are always in a struggle to tame our garden. Your helpful hints means we need not struggle alone anymore. Thank you for dropping by to visit and also for allowing me to return the favor.
I’m enjoying your posts. The garden of darkness and light is well written. Thank you for taking the time to come by and comment! I appreciate it.
Your garden is gorgeous, sure wish I had a longer growing season.
Your Asian pear is beautiful! I hope you get fruit this year. Thank you for stopping by. I appreciate it!
nice article..greetings from Indonesia
http://cahyadip.wordpress.com/2014/05/06/memanaskan-mesin-sepeda-motor-yang-benar
Thank you for coming by! I appreciate it.
I am using milk jugs to start my pepper plants this year. Well, I’m trying … not much is happening in there right now. It’s a waiting game to see if a little bit of a recent cold snap didn’t mess up my plans. 🙂 Nice post.
I’ve got a post called “The Seed Collector’s Insanity: Tips And Tricks For Starting Your Seeds” that shows how I start seeds reliably in milk jugs. I hope you are successful with yours! Thank you for coming by. I appreciate it!
Thanks for the tips. I can already see a couple of my mistakes … so … that doesn’t look good for the peppers. Ooops.
Great idea I will be using this for my garden as well! I had completely forgot about this until I read your post. Thank you!
You are welcome! Thanks for coming by. I appreciate it!
Milk jugs make great little green houses for early planting. We pop the tops back on to protect against a late freeze at night, but must open them up once the sun it is up.
Lovely pictures. Crops look yummy!
Thank you! I am grateful for the milk jugs! There’s no cheaper way to do all of the things they are good for. Thank you so much for taking the time to comment. I appreciate it!
thanks for liking my blog post! i’m a dog-lover myself.
Thanks for coming by and taking the time to comment! I appreciate it.
You had me at “milk jugs.”
No, really…now I want to go out and plant things…
Good for you! I’m glad you enjoyed the post. Thanks for stopping by. I appreciate it!
That sure *is* a beautiful radish!!!
Thank you very much! I hope you enjoyed the post.