


I’m trying a lot of new stuff this year. I’ve got wicking beds started. I made huge, permanent ones for fruiting bushes.

Then I have some specialty holes I have for two trees that don’t like my soil.

And THIS project: hydroponic buckets filled with peppers and tomatoes. I got my idea from this guy’s YouTube channel: https://youtu.be/zSqqj-E8obg?si=91HzFxfJscGz-JDf but he’s always encouraging people to start with GREENS. He also only has a few hydroponic set ups. There’s no big soil based garden or twelve years of growing fruit trees, with a lifetime of gardening behind him, which is: what I have. I’m also in south Texas. I am gardening on a quarter acre of land and I have a twelve year old food forest that I’m constantly adding to. (Plus: I have some reservations about the safety of the pvc downspout he uses. Pvc is not food safe, but is considered safer than the plastic that water bottles are made of. Most home’s water flows through pvc pipes, however it doesn’t tend to sit in the pipe for weeks before consumption. I bought a downspout for trialing his methods. But, then I found out information during the research I did on the plastic buckets that have made me a little leery. Not sure if I’m still interested in the downspout experiment. Flushing the system after filling it may help with leaching. Link)
I also don’t have weather that’s good for spring veggies like greens and I really don’t have the patience to work hard on a crop, that I really just don’t eat that often. I’m all about calories per acre and preserving my harvests. Greens are something I usually skip because I have several huge garden experiments running. It’s a patience issue, and I tend to not have much of that.
Anyway. I never follow directions. I look at a problem I have, think, “huh”, and build a solution.
Although, I will admit that I have been studying wicking beds for several years now. My mother uses wicking pots like these: https://youtu.be/7jbSPXANC7A?si=_p-InM8SDWKccJES
and she loves hers.

PS my mom and I love Leon and his YouTube channel. He’s from Oklahoma and our family is from Kansas. He talks like every Kansas farmer I’ve ever met and reminds me of my grandpa (even though he’s probably ten or twenty years younger than mine was.)
I finally have made some time to work on water saving ideas. I don’t want to run pumps or mess with outlets, so water pump towers are out. I want something that will improve my harvest (like my hugelkulter beds) and save water, but it can’t cost much to make and doesn’t take much upkeep. I really like water wicking pots.

I also refuse to remake structures on a yearly basis so, I avoid large wooden beds or big expensive plastic containers that will rot in our extreme temperatures and sun.
I went ahead with this small bucket design for several reasons: it’s a no electricity design, I only have water and nutrients to worry about. Plus, I already had everything but the nutrients and the saw bit.

I have a horrible time with our heat and getting tomatoes and peppers to produce. Plus, we have +100°F summers and no rain for months. Everything gets drought stressed, because it’s nearly impossible to keep stuff wet enough. The holes I dug for the pawpaws I’m trialing took about a week to finish. The wicking beds are not done because I have had a massive migraine for almost two weeks. Grr.
I have everything to finish the big wicking beds, but I’m not going out in 90°F weather, with a unusually bad migraine and trying to build stuff.
I have some cool weather blowing in this weekend so I’ll work outside then. But, something I could do was set up this bucket system inside in my kitchen. (BTW this is a really messy project. Don’t do this over carpet.)
If you have been on a hundred different sites and can’t figure pieces of this out, don’t worry. I will show you everything. For whatever reason: there’s some things I couldn’t find examples for and had to figure them out on my own.

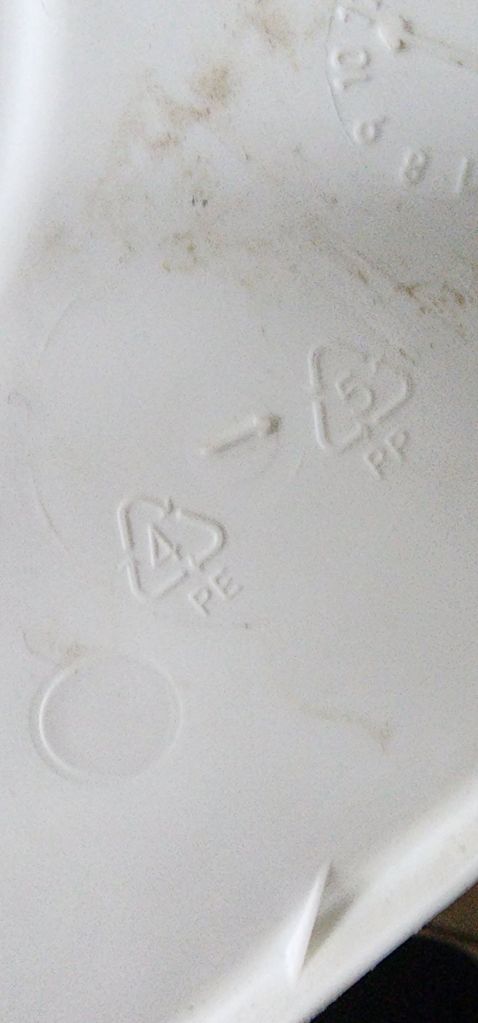
So: One – You need buckets with lids. Most people are buying buckets from retailers. If you have cats: buy your litter in plastic buckets. Before you gross out, cat litter is mostly clay. Wash them out with dish soap and you are closer to the end of your project. I get our brand of litter from Petco. We have two cats and I haven’t wanted to throw those buckets out. Now I have a use for them. Look at the bottom of your container. Mine are food safe. Numbers 2, 4 and 5 are considered very safe for food, doesn’t really matter what the letters after the number are. If you don’t have cats, you can get used pickle buckets from firehouse subs for a few dollars (you could also try bakeries and ask for 5 gallon frosting buckets) or get the 5 gallon buckets from hardware stores which are about six dollars for the bucket and two for the lid. That would add up quickly and this is becoming a trending project so I don’t know how long restaurants will have these available.

Don’t want to use plastic? I would find a different project. Everything but glass or ceramic will leach into the water. Most half barrels you can find held vinegar, not liquor. I’ve tried to keep goldfish in those and it had such a low pH, it killed all my fish. I don’t recommend trying those filled with water, the pH will eventually kill your plants. With metal, you don’t know if it’s mixed with something toxic. Plus, I’d rather have plastic than metals. Metals are hard to metabolize and can have things in them that build up in your body (I’m aware plastics can do this too, but we’re looking at food safe plastic. I don’t know where to get food safe metal.) And unfortunately, pretty much everything we buy from the store has had some time in contact with some sort of plastic.
Plastic buckets are a choice for convenience. They are cheap (in my case free), easy to work with and fast. If you want to skip plastic: go with soil planted plants. But if you are at your wits end with trying to grow tomatoes in hot, dry climates, and you are spending twenty dollars a fruit: let this be your salvation.

Drought stress is my number one problem and this bucket system solves it. Sometimes the easiest solution, is the one you need to embrace.
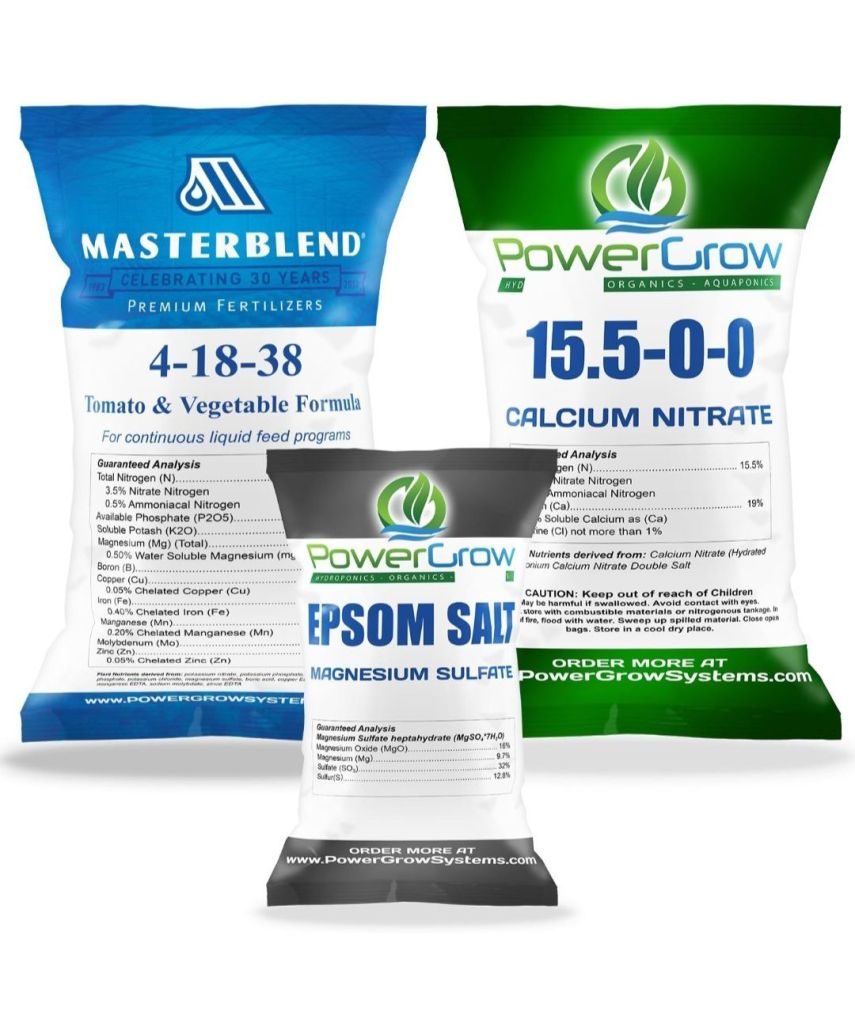
Next, hydroponic nutrients. Notice I did not say fertilizer. There is fertilizer in the solution but it isn’t the only thing. I bought these products because they were recommended by people with way more experience with hydroponics than I have. You may already have a brand you like to use. But if you are like me, take advice from more experienced growers and buy this: https://amzn.to/4b3L100 .
Three: Pool noodles. This one is tricky. Buy whatever noodles you can find. I had both cheap dollar store ones, and: more expensive beefier noodles, that I got off Amazon. I purchased those for a Christmas project a couple of years ago. I assumed the guy I was watching was buying the cheap SMALLER DIAMETER noodles from the dollar store, so I bought the two inch saw drill bit he recommended. Don’t buy the bit first.

Find whatever pool noodles you can, then find a saw drill bit that is smaller, (like by a quarter of an inch or so) than the noodle. This is really important. If you make a hole the same size as your noodle it will not hold the plant in place. If you grew your own hydroponic plants and there’s no soil involved, this isn’t such a big deal. But, if you bought a flat of tomatoes in starter pots, that’s going to be pretty heavy for the opening in the center for the stem and soil.
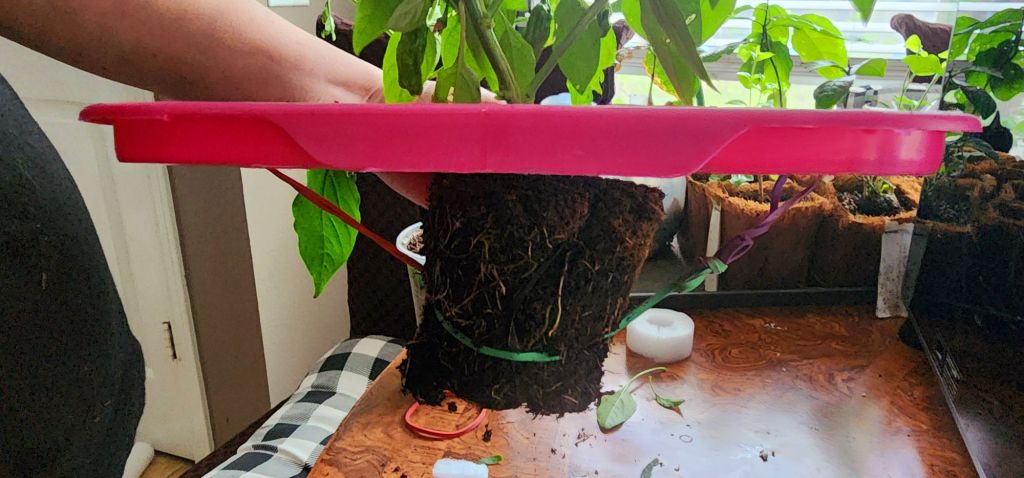
You can fix this by supporting heavy based plants with a smaller pot, upside down, inside the bucket you are using. Or you can run elastic or wire for support like this:

But, I don’t want more assembly, so I am working on the tension of the noodle and the plant stem and the inserted upside down pot.
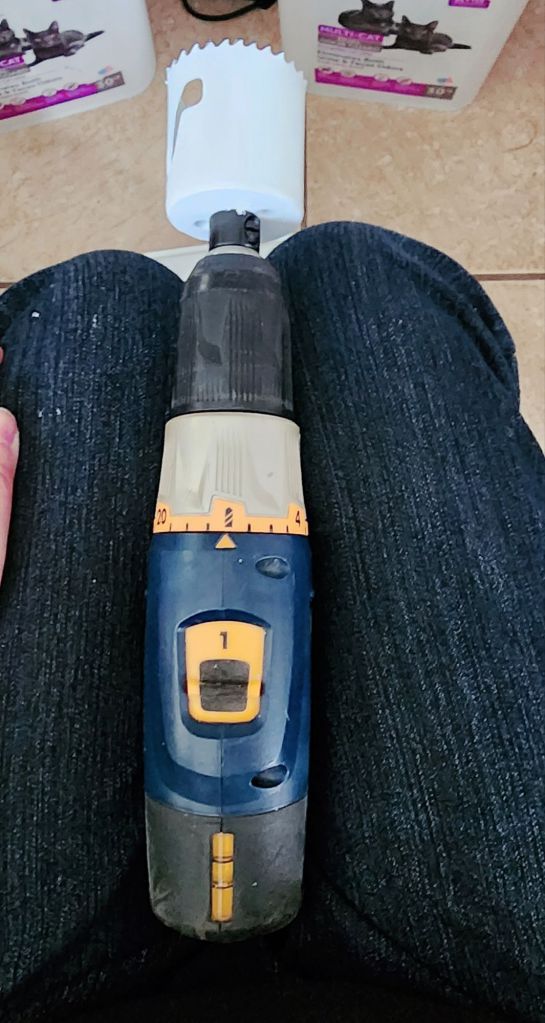
Four: Saw drill bit. I didn’t know anything about hole saw bits. I went in to Home Depot, found the cheapest one, purchased it and went on my merry way. It didn’t have a pilot bit. Some hole saws come with pilot bits: Some you have to purchase the pilot bit separately. If you don’t know anything about what I’m trying to say here: get the kind that comes as a set. Way less headache. You can then move on.

Next is assembly. Decide on how many plant’s per bucket you want to grow. I don’t recommend growing more than one tomato and one pepper. Tomatoes get really big especially if they are indeterminate. I don’t recommend stacking more than three buckets at a time, for stability. What I chose to do was drill three holes on the side or two holes on top. There should always be a hole, or holes, for your plants and also a hole left open, to fill the bucket and add nutrients through.
Mosquitoes? Yes. This will be an issue if you don’t put screen or cloth over the open hole for watering. I am also adding Bt to the water. It’s safe for humans and deadly for mosquito larvae. This is what is on mosquito dunks. You can always throw half a dunk or granules in the bucket too. I already have some Bt, to inject into my squash vines, to stop borers before they start. You can stuff little extra pieces of noodle around the stems to not allow room for mosquitoes in those openings. The noodle pieces also solve the stem weight/tension issues.

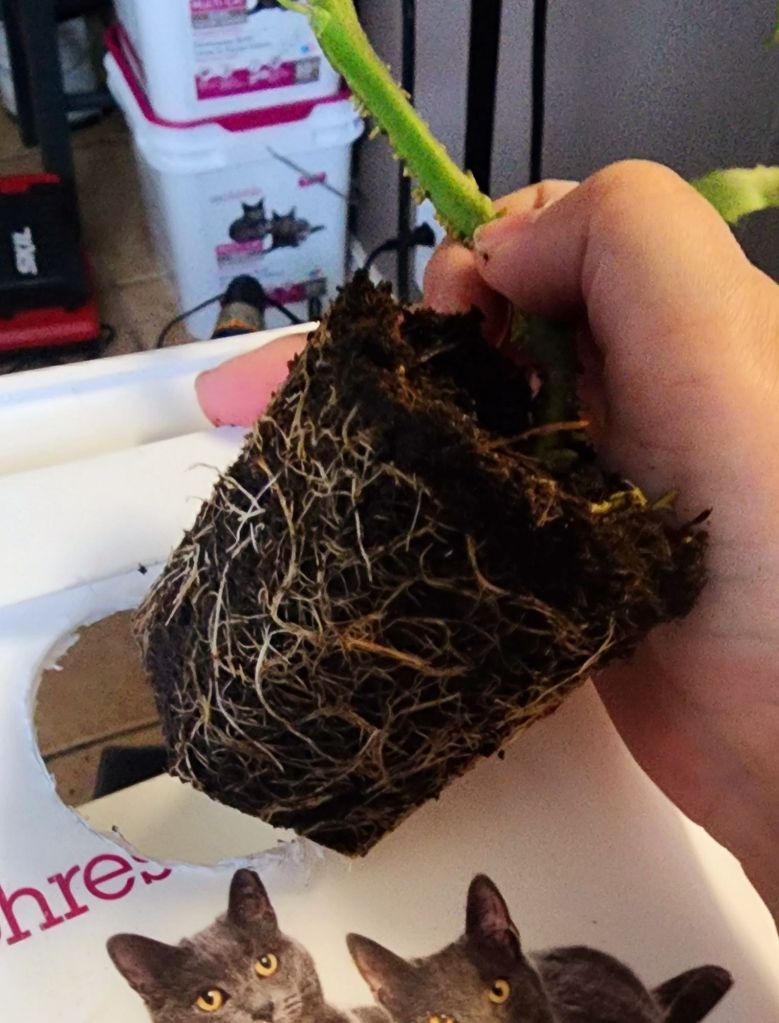
Assemble the buckets by either drawing the plant slowly and carefully through the hole you drilled. Or, carefully push the roots and soil into the hole. (It’s so much easier with home peat pots or starter pots from the store. Bigger pot sizes are harder to use.)
Then make a slice in the noodle to fit around the base of the plant. Like this:
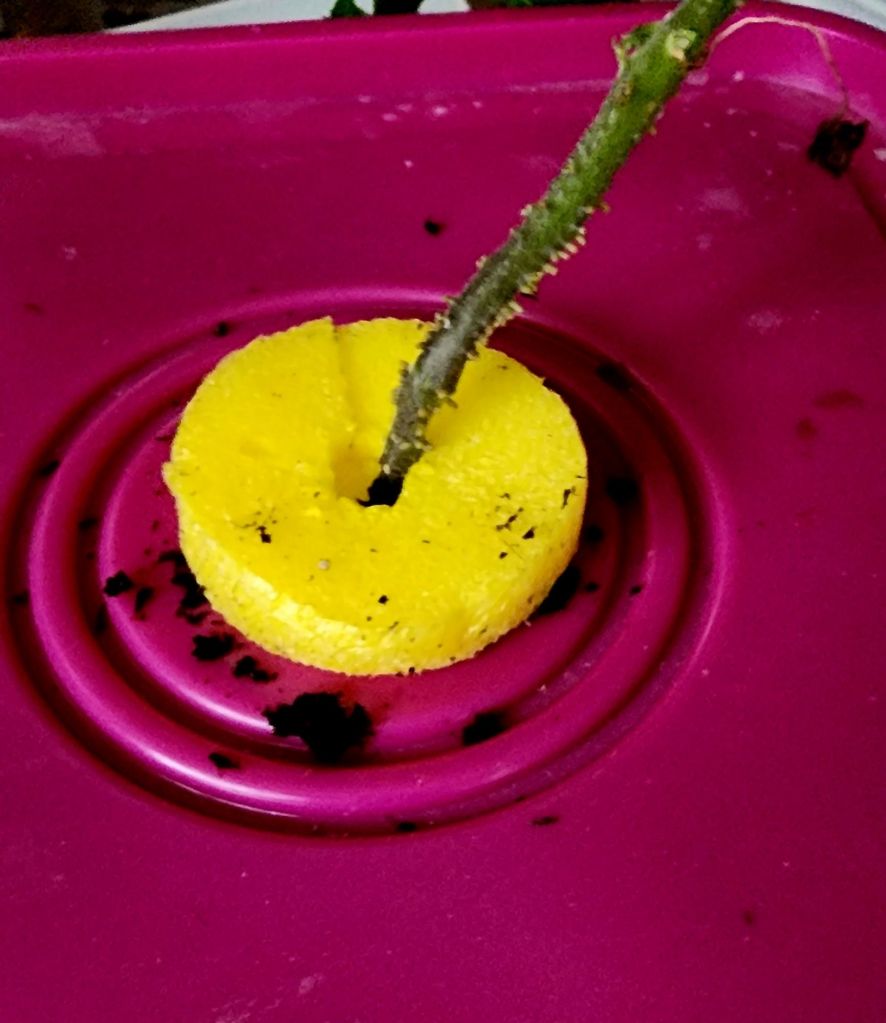
Place your piece of noodle around the stem (I had to cut an extra slice out to make it fit). Force the noodle into the hole in the bucket and add small slices of noodles to the central hole to keep your plants from sliding down too far into the bucket.
Now here’s the bit everybody skips directions on. I was super frustrated trying to find and answer to this before I started: the drain hole. If you are drilling two holes on the side of your bucket for two different plants, take your saw bit and drill an opening about half to a full bit size lower than your other two holes. This creates room for both air roots and water roots. You need both or your plants will die. If you built buckets with only one hole in the top for a plant and a second hole in the top to add water, you should then take a half inch drill bit and drill down somewhere on the side. I say “somewhere” because you should drill this hole after your plant, noodle, lid assembly are in place.


Look at how low your plant roots go. They should be slightly above the water. They should not be submerged in the water, (that includes even a small corner of the soil.) If you get the hole too high, great! You can always go a little lower with another hole. If you get the hole too low: you may have to use another plant or another bucket. Try to hit it higher, let it sit with water in the bucket overnight and check each bucket the next day. If your plant roots are sopping wet, go lower with another hole. If they are well hydrated but not under water, you are successful. This next part is how to accomplish that:
I decided to run paper towels over the soil and down into where the water reservoir will be. (This just made sense from science classes, way back in high school, about water wicking) This way I could stack everything, fill them up and go inside and go to bed. It was getting late and I was tired of playing with this project. I am keeping the paper towels in the buckets until roots grow past where they are or if I end up with some weird issue from doing this. The roots should follow the wet paper towel down into the water reservoir.
If you have a plant start to wilt, take the bucket apart and see if it is dried out and not touching the water. Adjust the root ball to just touch the water and watch it. I have also found that about two weeks in: the paper towels had completely dissolved and the buckets need to be dumped and new water added. I’m hoping this isn’t continuous and I won’t need to dump them regularly, but, I may. I’ll let you know as this goes.
I am also running aluminum foil around the outside of the buckets because plastic rots here. Those hefty five gallon buckets from the hardware store: splinter into a million pieces after being out in our sun for two years. It will also stop any algea trying to form in the reservoir. I plan to open all of the buckets tomorrow, settle on a height for both the plant roots and the drainage holes. Add the nutrients, wrap in aluminum foil. And let these go. I will be out there daily, since I have a ginormous garden.
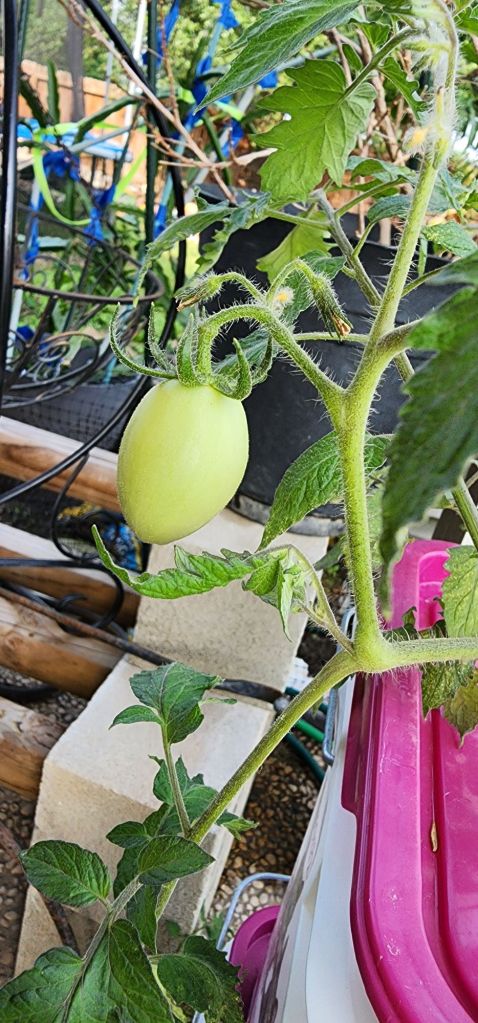
These are on the edge of my porch, where Roma tomatoes have performed well for me before. If I notice a lack of fruit I may move these, but our sun is so hot, I will still find some sort of shelter so the water reservoir doesn’t get too hot for the roots. Also, you should leave space between the buckets for sunshine and foliage growth.
I also have another eleven tomatoes out in my hugelkulter beds, along with: potatoes and onions. We shall see how my little experiment with water reservoirs (versus full sun and hugelkulter) goes. Like all of my major tutorial categories: I let you know which one of my projects is the easiest.


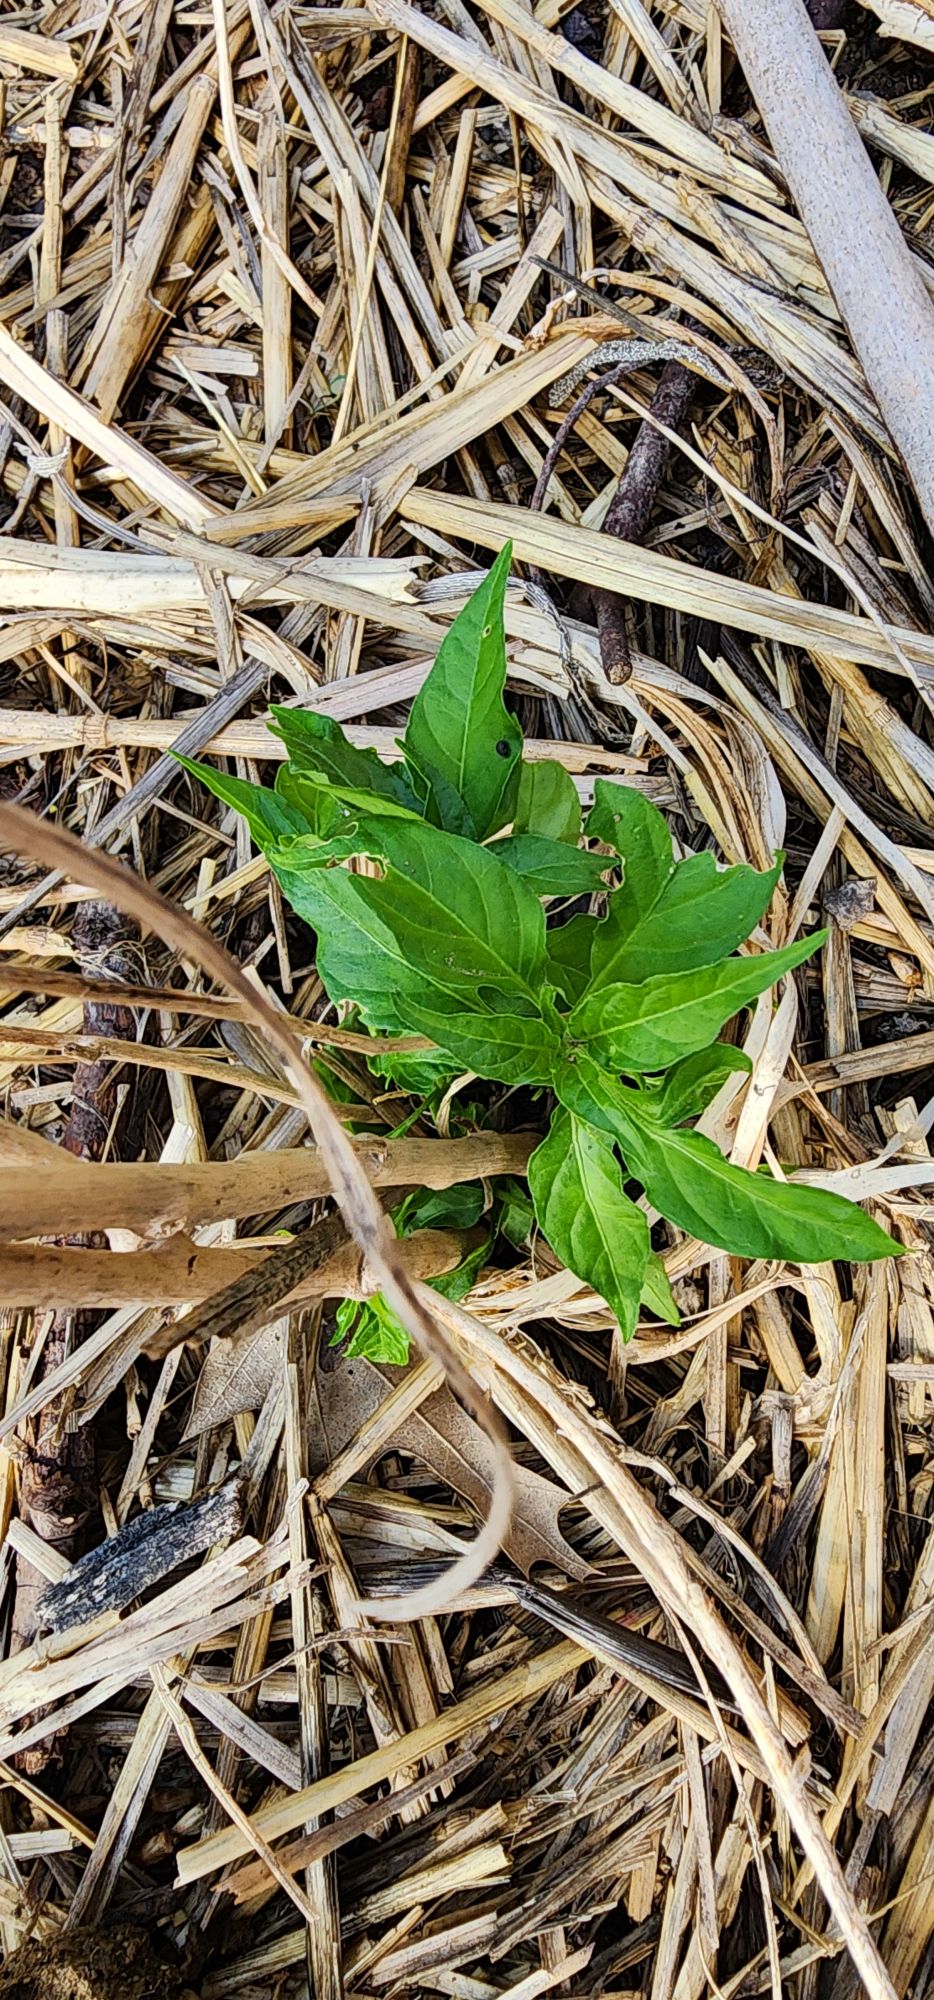
Update: I made these two weeks ago. One pepper had to be resituated and one died. But the one that died was in decline before I put it in the bucket. Sometimes, plants just don’t want to live and you can’t fix that for them.

For me: This was fast, lightweight and simple. I would try this first if you are following my garden beds or the holes I dig for trees. If you are kinda thinking these sound fun and you’d like to try them: I really encourage you to go ahead and build a few of these. Hopefully we all enjoy these no work, non electrical, hydroponic growing buckets for tomatoes and peppers.
See you out in the garden, to try funky new ideas!
Crazy Green Thumbs

Discover more from Crazy Green Thumbs
Subscribe to get the latest posts sent to your email.

I am so grateful for this post!
I’m glad you liked it!
Again, it makes me appreciate the weather here. I would do without tomatoes if I need to put that much work into them., . . . . although watering them is quite a bit of work.
Everything you see in grocery stores is hard to grow down here. I wanted to can tomato paste and soup this year so I went overboard on tomatoes. Now I just have to pull them before the birds and mice get them!