


OK, I know that anyone who has made sourdough will argue with me that there is no “easy” sourdough. But trust me here for a minute, and let me demystify some things begginers struggle with. Sourdough can be easy, it just takes time.
Mystery one… The starter
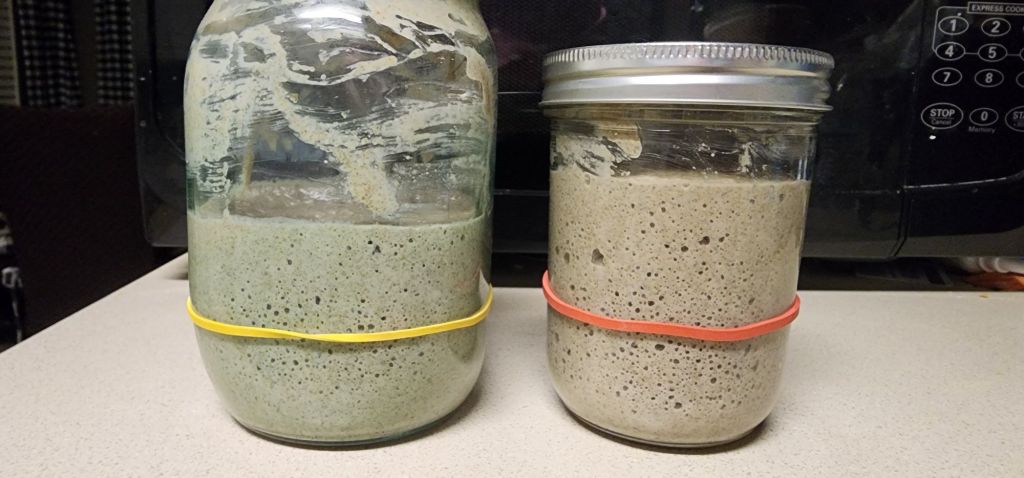
How do you make sourdough starter? Easiest, surefire way? Get yourself a kitchen scale (yes, you do need one), a quart mason jar, a rubber band, bottled or filtered non-chlorinated water and some rye flour. Why rye? Because it’s the easiest flour to start with. Rye flour will be the most active and the easiest to maintain because so much of it is primed and ready to make the carbon dioxide and sugars (from wild yeasts), already present in the flour. You don’t have to buy starter and I don’t recommend all purpose wheat flour for your first couple of goes. You won’t taste the small amount of rye flour once you add everything together. If the top of your starter looks dry and solid and/or the starter smells rotten and cheesy: it’s growing mold. I got the stomach flu from my kids. Missed two days of feeding my starter (this was probably a three month old starter, too.) and I had to throw it out. But you normally wouldn’t go that long between feedings. Usually you can go about 24 hours in between feedings.
This is like learning how to ride a bike. You are balancing several different things at once and you need to at least bake sourdough once, to really “get” what is going on.

Mystery two… Starting and maintaining starter: the dredded discard
Mix 25 grams of water with 25 grams of rye flour in a mason jar. Stir to combine. Mark where your starter is with the rubber band around the jar. Cover the jar loosely to keep anything from drifting in, but allowing gas to escape. Leave it overnight. When the starter expands and starts to fall, add 25g rye and 25g water and stir. You have now officially created your first feeding. After this: discard the volume at the rate of about what you will be adding. Do so before each feeding.

This is where I need to stop and explain something. Feeding is done by a ratio. You remove some of the used starter and discard it, before the next feeding. Keeping less of the old is actually better. I have tried saving starter because I thought it was wasteful to toss it. I have tried refrigerating it. I have tried “no discard” and ended up with nail polish (acetone) smelling dead starter. (Rye is a fast fermenter, some acetone smell is still OK as long as the dough is bubbly.) It has to be fed a ratio, referring back to the amount that you already have. If you just keep adding the same amount of new flour and water to the starter jar, to feed what you have, and don’t discard: eventually it will need more to feed it, than you can reasonably add. It will then get off balance, become too acidic and the starter will mold and die. If you want simple: just throw out some of the starter before every feeding. Sourdough baking, from mixing to removing from the oven takes about 6 hours. Because of the time commitment, you will eventually want some “simple”. I now make starter out of whole wheat flour because it’s cheaper, but I’m really glad I learned to start and keep starter using rye.
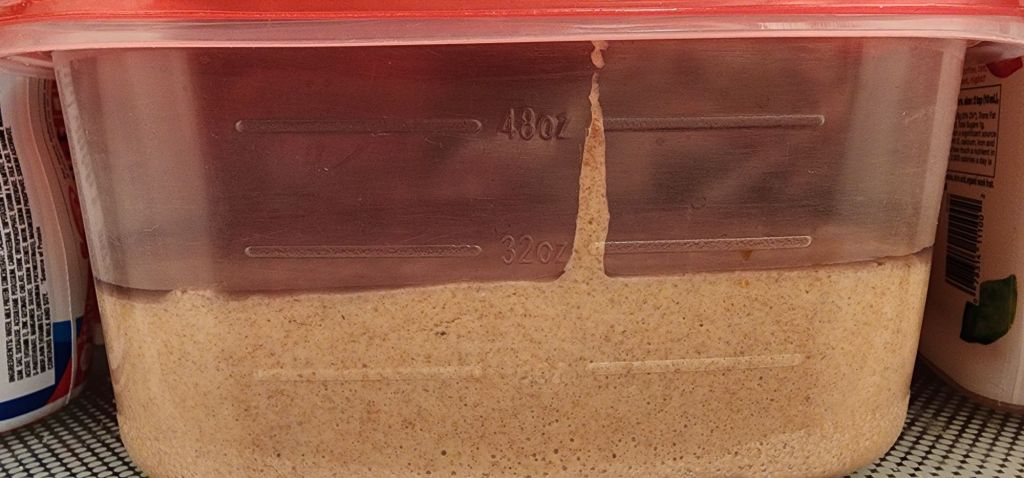
I don’t bake enough to use discards. In fact I am usually low carb-ing it, so trying to find a way to use the discard before it molds just doesn’t work for me. I am eating sourdough to improve my gut flora. (I also make yogurt and refrigerator pickles to accomplish this.) Maybe you make pancakes or dense breads, where you can use the discarded dough. I don’t. You can freeze discards too, but again if you don’t regularly use it, you can end up with a huge amount of spent sourdough starter with no purpose.
Another mystery I ran up against was to autolyse or just using levain. I have found just building and adding levain (Like the video below. Levain is building a big glob of fermented dough from your starter in expectation of baking with it within the next day.) works better for me. I followed several videos trying to expand my skills, some with autolyse (autolyse is a process of wetting the flour and letting it soak up the water and this also starts creating the elasticity from the gluten. Autolyse softens flour combinations with a lot of whole wheat or rye. I usually see it with European baker’s and they have non-gmo wheat over there. They have completely different flour. I mostly use unbleached all purpose white flour from my grocery store, so autolyse is really unnecessary.) I just ended up with an inferior product. I don’t know why, but levain works perfectly for my needs.
Next mystery: who actually has the easiest recipe to follow? Brian Lagerstrom does. I have followed this recipe repeatedly and never had a failure. Interestingly, wherever he is at: he doesn’t have the humidity (your dry flour can hold a surprising amount of water, through humidity) from the Gulf of Mexico, that I have. So, his dough recipe is too wet for me. I use 290 g of water with the same measurements of all-purpose flour, whole wheat flour and levain that Brian uses. I have yet to be disappointed in Brian’s sourdough instructions. I can’t say the same about other people’s instructions.
I also use bread diastatic malt in my sourdough. It adds flavor and helps caramelize the crust. You add it to the dry flour before you start mixing everything. Great stuff. You only add about a tsp per loaf. It’s an option, not a necessity. Adding courser flour, like wheat or rye does something similar.
I am not a novice cook, but I have always used a bread machine for bread. At 50+ I’m happy to have learned a new skill.
Here is all you need to learn to make sourdough:
Instructions for the starter by Brian Lagerstrom
Instructions for the bread: (also by Brian)
He’s an enjoyable and interesting host.
Brian offers ways to do sourdough with very few things to buy. But I own this kit and I use everything in it. It’s definitely helpful. Especially the bread sling. (I never burn my hands putting the dough in the hot Dutch oven.) https://amzn.to/4ftnubf
Just so you know, this is about a six hour journey on the day of baking. You can fit other activities in around this. A lot of bread making is letting it rest and ferment. I suggest writing the instructions out so that you can guesstimate the timing. (That way you can more easily fit it into your day.) Then follow along with Brian’s video each time you bake, until you can do it on your own. I still watch every time, even after months of baking. My memory is just not that great, plus I have a billion other things on my mind.
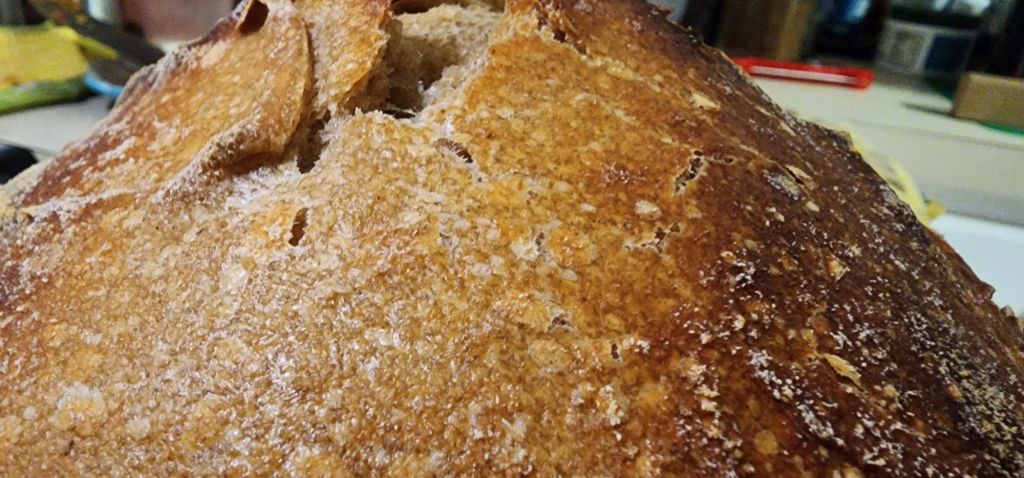
This is a remarkably easy bread to make, it just takes time.

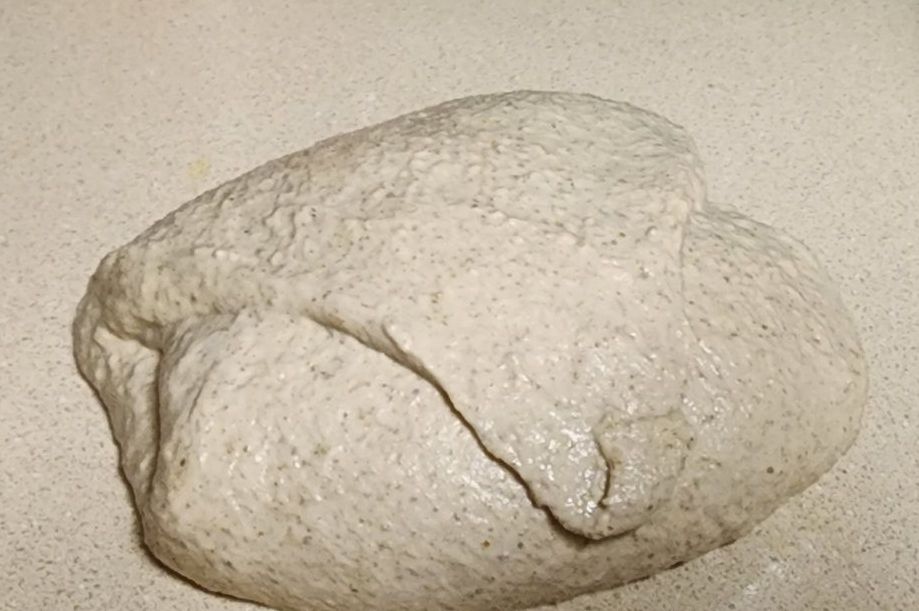
Watch your dough. If it doesn’t look like Brian’s dough: you either got it too wet or you over or under worked or over or under fermented it (or you stopped everything and put it in the fridge overnight.) My problem was mainly moisture but a little extra folding has never hurt it. Since you can’t fix the composition of the dough after you start folding it, it may take a few different tries to start to get your dough where you want it.
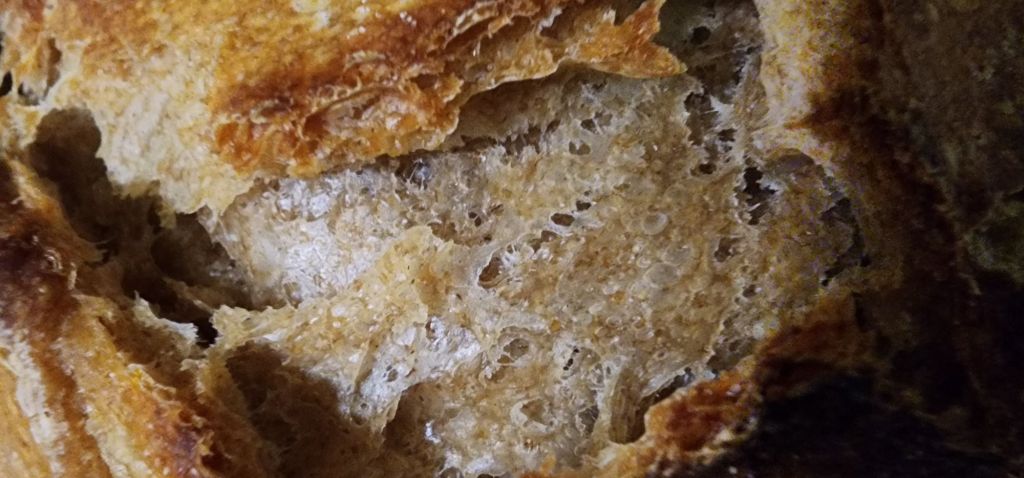
I also tried refrigerating my dough after the shaping. People say you can do this, but if you do, the dough won’t have a lot of “oven-spring”. I don’t recommend refrigeration unless you just can’t stand any more bread baking for the day. Oven-spring is what makes sourdough special.

And although Brian says you can definitely add more flare to your dough making skills, I don’t recommend running off and following instructions that are vastly different than his. I followed a German baker, who I figured had been bread making since he was young, and my bread from his recipe was awful. Live and learn (ie follow Brian!) I gave up after trying that guy’s bench scraping/folding technique. Holy mackerel that was a lot of work! And Brian’s bread was still better.

The one thing I really recommend is the baking setup the German guy had. What he used is something like this: “Brovn”. (It’s here for my European readers: https://www.brovn.com/en) once you’ve seen the video on that site bake bread with it, you’ll want something like it: just to keep an eye on your masterpiece as it rises.
Unfortunately, it’s only for sale in Europe and I emailed them from America with questions, they didn’t answer me. So, my husband found a work around here in the States with a cast steel pizza “stone” https://amzn.to/3AHIvjw and an upside down borosicate glass bowl set https://amzn.to/48UUQ08 (The mixing bowl set is made of high borosicate heavy duty glass,heat resistant and sturdy, which tolerates -4℉(-20℃) to 1040℉(560℃))
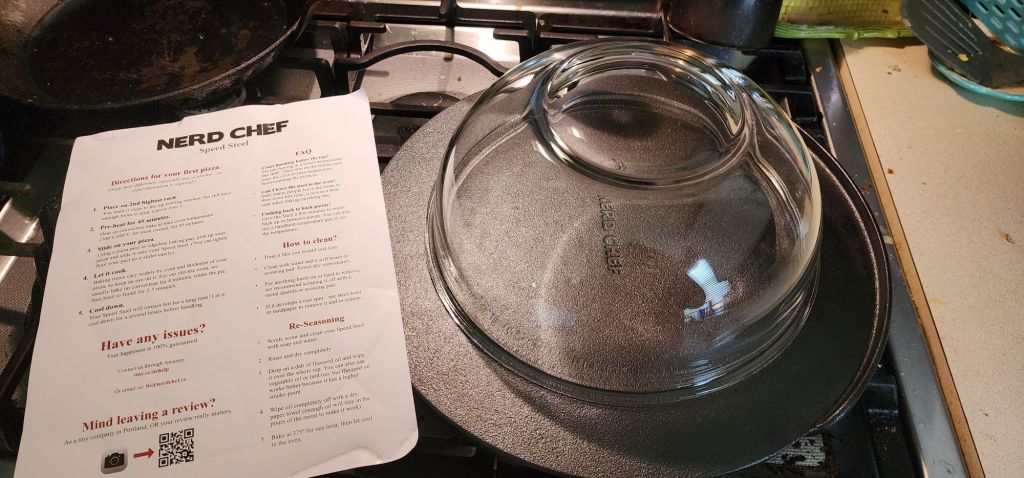
We’re heating at a max of 500°F. Way below what these bowls can take.
This is not regular glass. Do not attempt to use a regular glass mixing bowl, it will shatter in the heat required to bake bread! I also don’t recommend it for natural klutzes (although, I am one.) Just go with the Dutch oven like Brian has, if you don’t have the correct, high heat rated borosicate glass. It’s a fun option though.
The only thing you are missing on my version versus the Brovn is the rim on the bottom stone for the edge of the bowl. (Which is not a big deal if the only other option is a trip to Europe to buy the Brovn.)
If your oven doesn’t have a rack on rollers, this breadbaking (in a Dutch oven or my improvised Brovn) process will be more difficult. Remove any top racks before you heat everything up.
I use gloves like these to handle the bowl/Dutch oven lid: https://amzn.to/3YORtU9 the gloves are rated for 500°F. You don’t want melting gloves while you are grabbing things! Also stay aware and handle things carefully (but all things going in and out of the oven have to be handled carefully.) For this reason: I don’t recommend Brian’s steam option with towels and lava rocks. I just know I’d spill enough water to break the hot glass in my oven door. That’s an incredibly expensive repair and a risk I’m not willing to take. But, like I said. I’m a klutz.
For my improvised Brovn: Heat the bowl and pan in the oven at the same time you heat the oven box up. Then add the bread to the pan and cover with the hot bowl. When you remove the bowl, during the end of the recipe, carefully place it on a cool stove to avoid burning your counter top. You can remove the bread from the oven with the gloves, too. I leave the cast steel pizza stone in the oven full time, like you do with a regular pizza stone.
I also recommend these baking tins, if you want sandwich bread. https://amzn.to/48RqYBW
There you go, best and easiest way to succeed with sourdough bread. Plus a hack for a European only product. Meet you in the garden where we can compare oven-spring and sourdough crumb!
Crazy Green Thumbs
Disclaimer
The content on this blog is protected by copyright law. Any unauthorized reproduction, distribution, or display of this content is prohibited. We reserve all rights to our original materials and intellectual property.
Discover more from Crazy Green Thumbs
Subscribe to get the latest posts sent to your email.

I love a good sour dough!
Me too! There’s nothing better than a fresh, hot loaf of bread!