


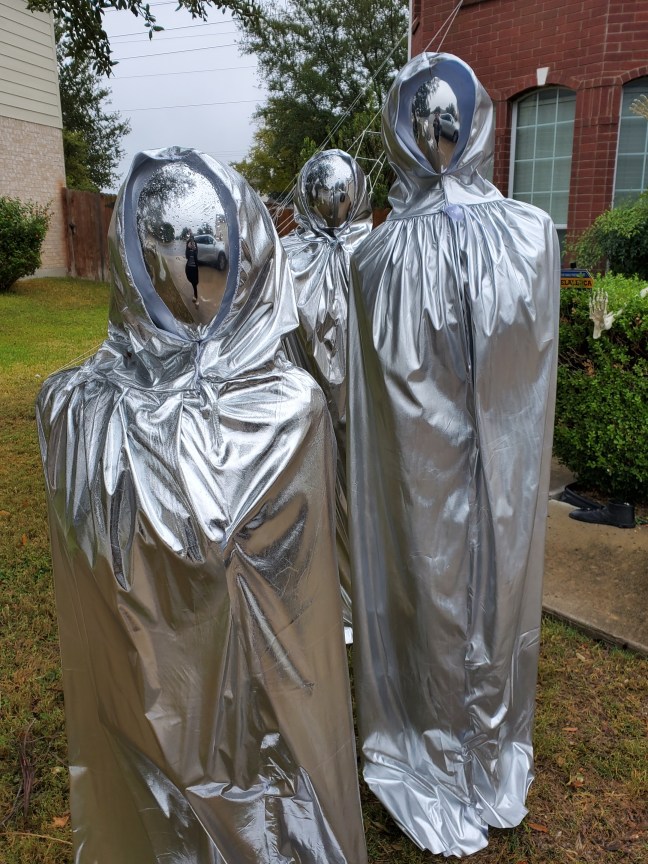


It’s Halloween time again! I’m trying something new this year! Silver Faceless Aliens! They are human height and shape and creep everyone out! I instantly had the idea after looking at this mask. So much fun! Like all of my projects: it’s super cheap and has a big impact. I’m making four.


Here are the supplies you’ll need:
59 inch silver cape. These are available from multiple suppliers. Here’s the link to the cheapest, fastest shipping option I have found: Silver Cape
Silver Faceless masks. Again, this is the fastest cheapest option: Faceless Mask

You can use any mask with this, and there are a ton of silver masks out there. But the Faceless one is pretty creepy and was the inspiration for the entire project! Here’s some other ideas:

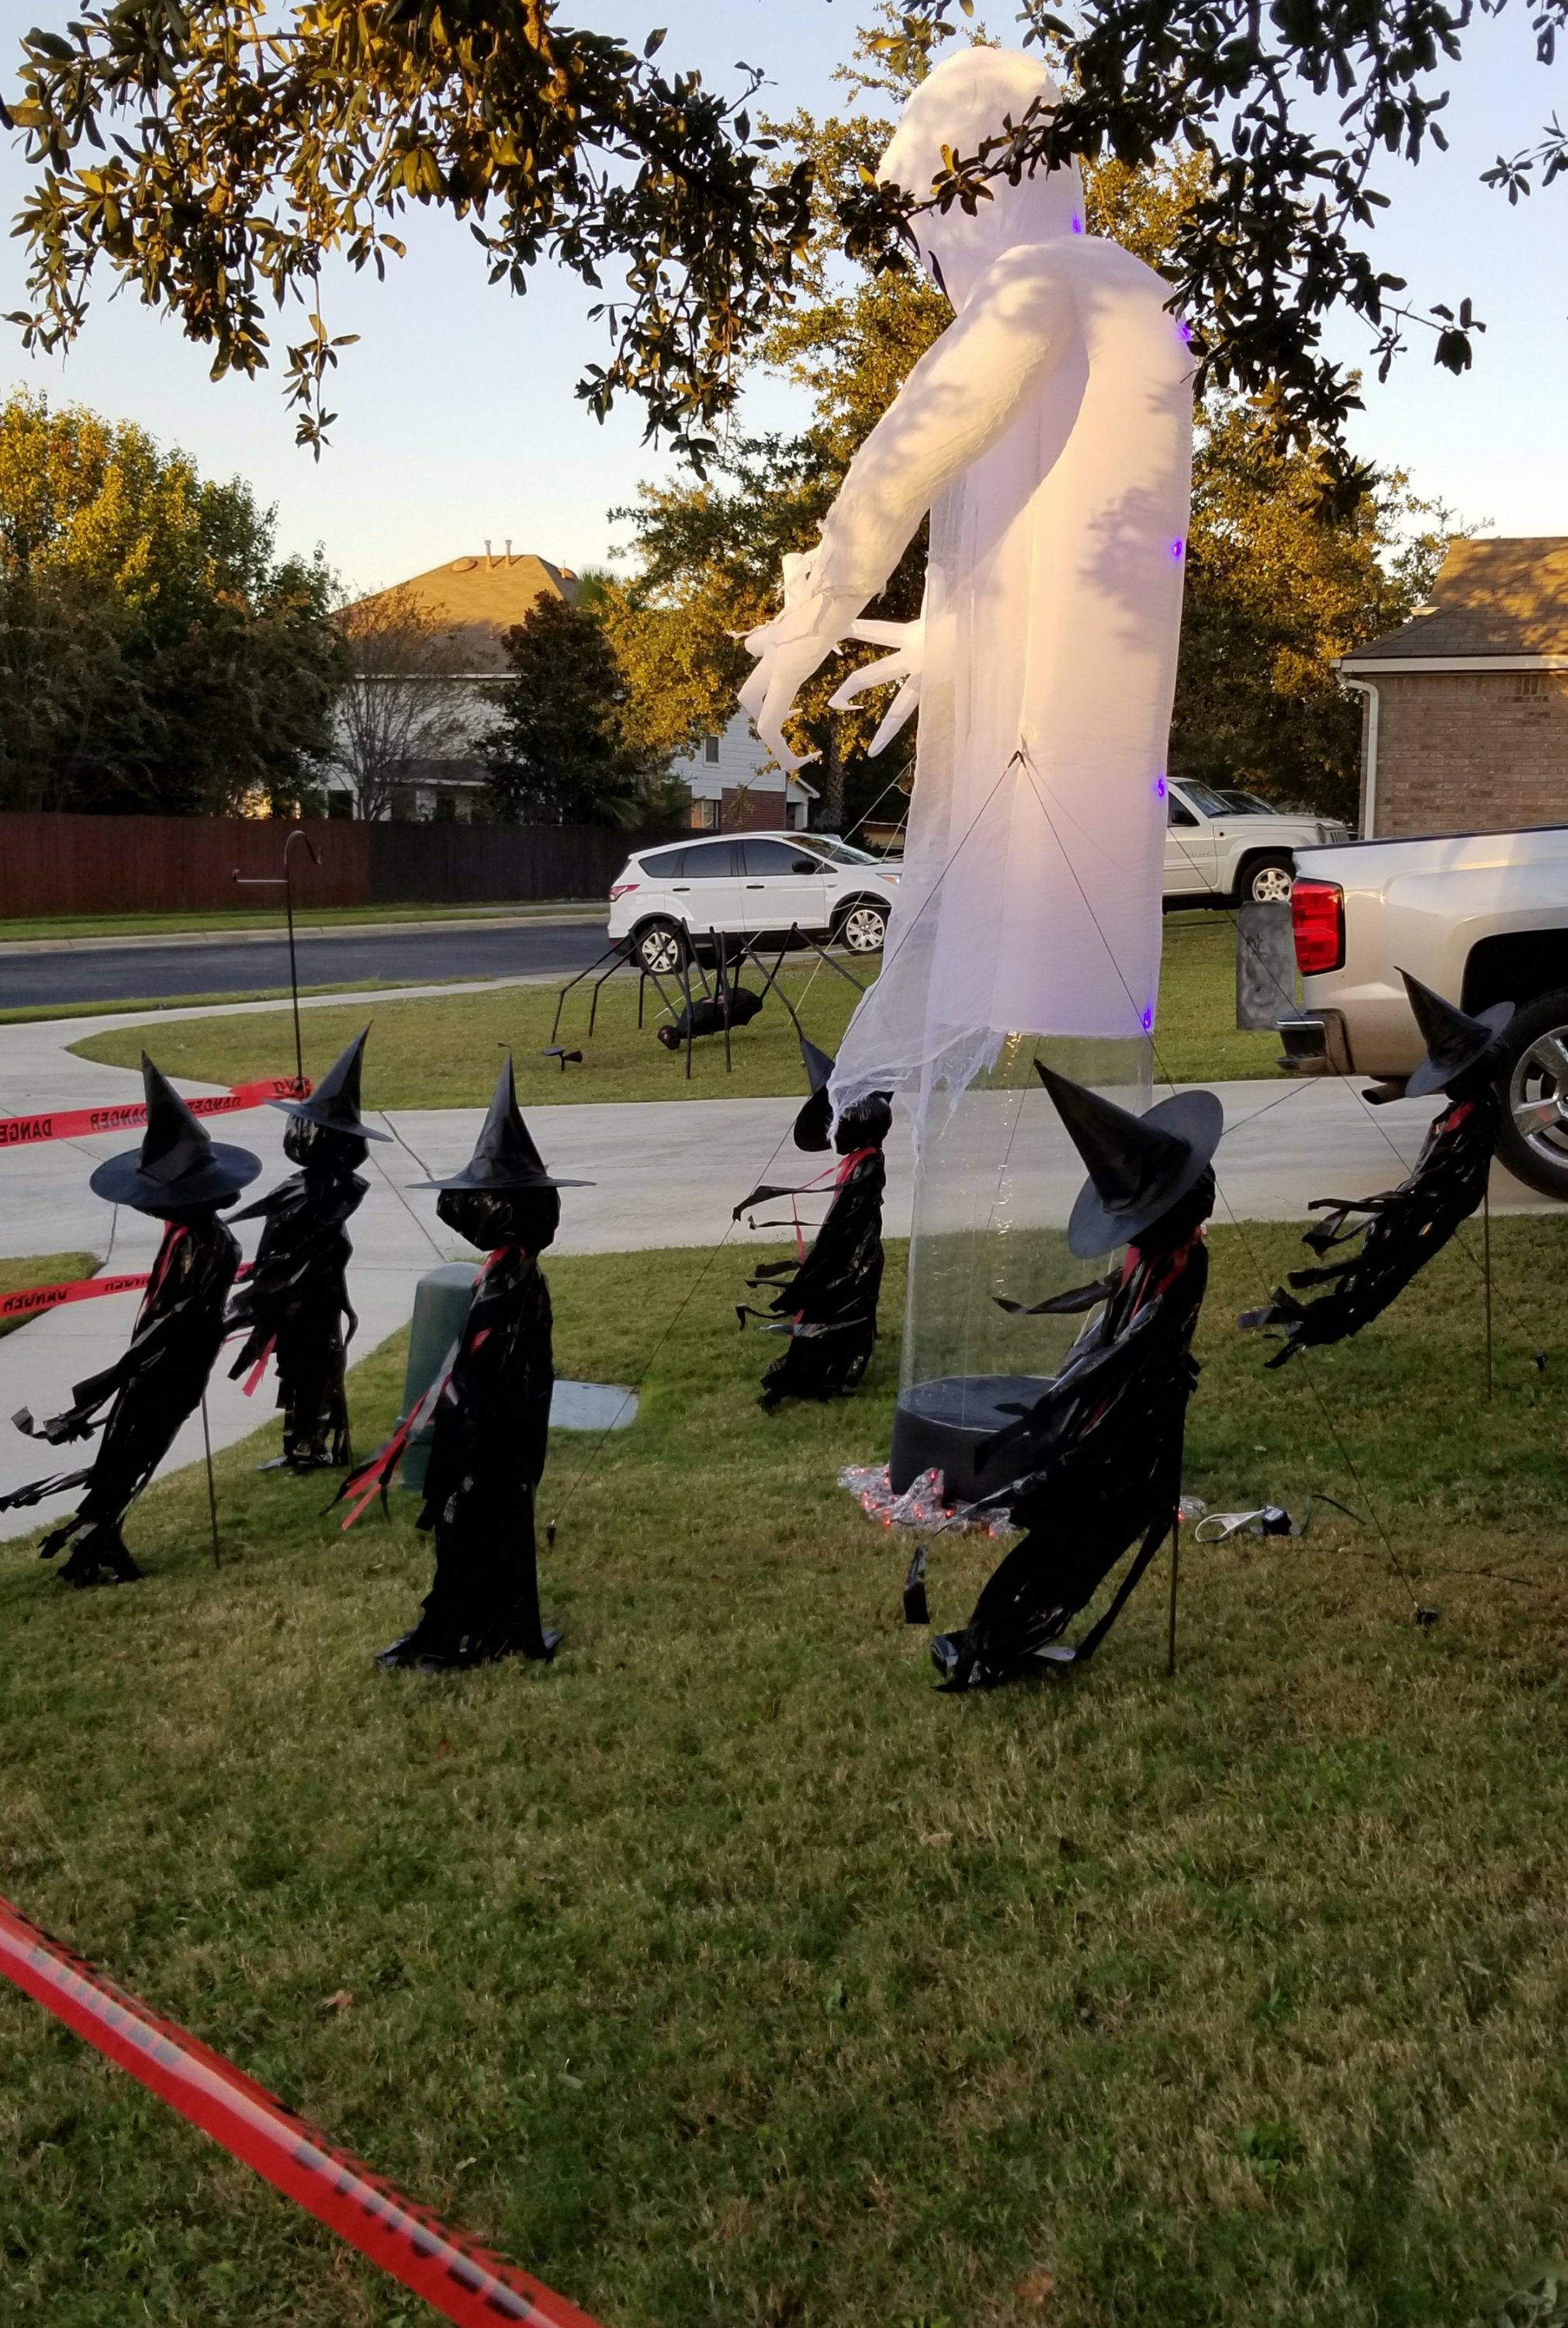
My oldest son is dressing in one of these costumes and standing out in the yard to scare trick-or-treaters. (And, yes, you can actually see through these masks.) We’ve had people pretend to be part of their yard’s decorations before, and it’s hilarious when they jump out at people, although you certainly shouldn’t be close enough to someone that they can hurt you out of surprise! This works well when people assume there’s only static ones in the yard.
I’m also making other masked PVC supports: Haunted Heads. PVC and rebar are always good things to have on hand for Halloween!

What you are creating:
A support made from PVC pipe and rebar
A human shaped form made from your choice if either plastic wrap or bubble wrap and packing tape
A head
A mask and cape
Supplies you need:
1/2 inch Pvc pipe (in plumbing at a home improvement store like Lowe’s or home depot.)
1/2 inch Pvc cross tee (in plumbing at a home improvement store)

Foam balls
Rebar (usually at the very far end of the store, with the concrete and roofing supplies at home improvement stores.)
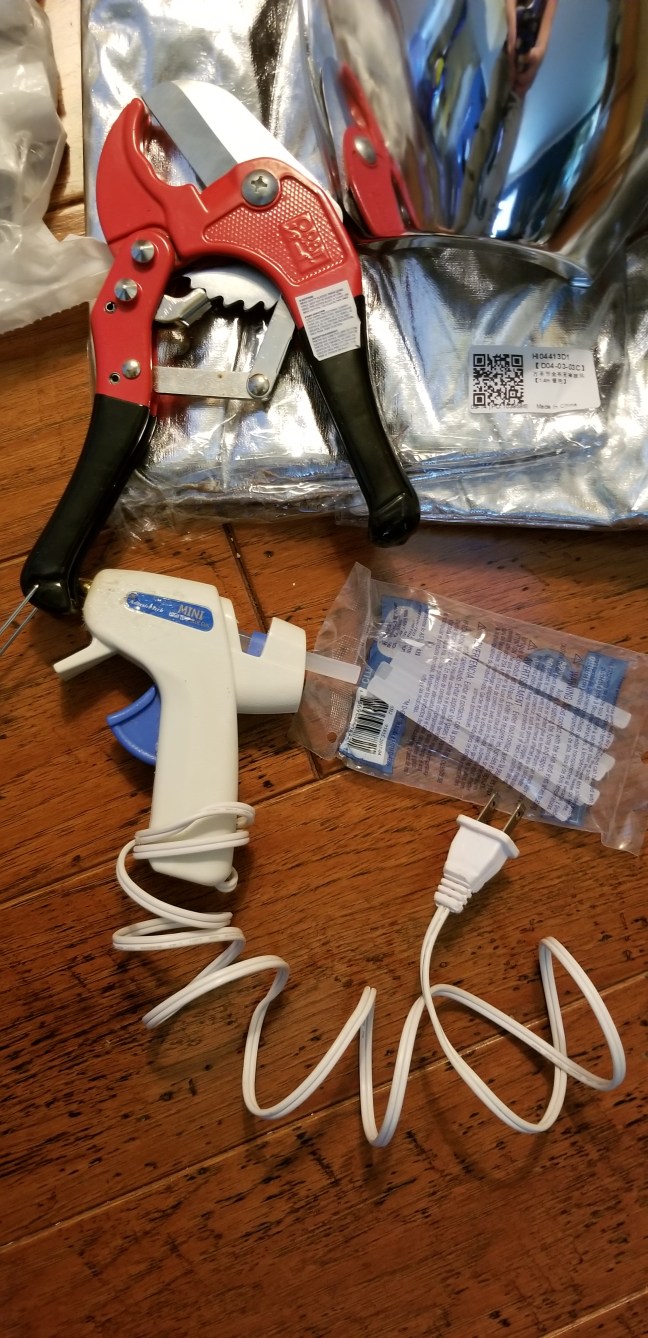
Glue gun and glue sticks
PVC pipe cutter at a home improvement store
Landscape pins (in the garden area in home improvement store or plant nurseries. )
Optional:
Dress form
Packing tape
Tape gun
Plastic wrap
Scissors
Or, option 2:
Bubble wrap
Packing tape
Tape gun
Instructions:
First thing you need to do is get the wrinkles out of the cape.
Before and after: ironing. It makes a big difference!


I chose to iron mine. A steamer would be safer to use, but my steamer is not working. I had to really watch the fabric. The heat setting on my iron was between 1 and 2. This stuff needs almost as much heat, to successfully iron it, as it would take to melt it. This was slow going, until I found the sweet spot (as far as temperature) to iron it. I also tried a hair dryer. That was a no go! That didn’t help at all, not hot enough. I also thought about throwing them in the dryer. But, they melt at such a low temperature, I was afraid I’d ruin the drum with melted plastic.

Next you need to make the human shaped support for the cape. This is really simple with a dress form. Hobby lobby has these and they have weekly sales and 40% off coupons. Check their website or app before you head out to get the support. If it’s not on sale, wait until it is!


I’ll show you why bubble wrap or a packing tape support for the cape is pretty necessary for the desired effect:
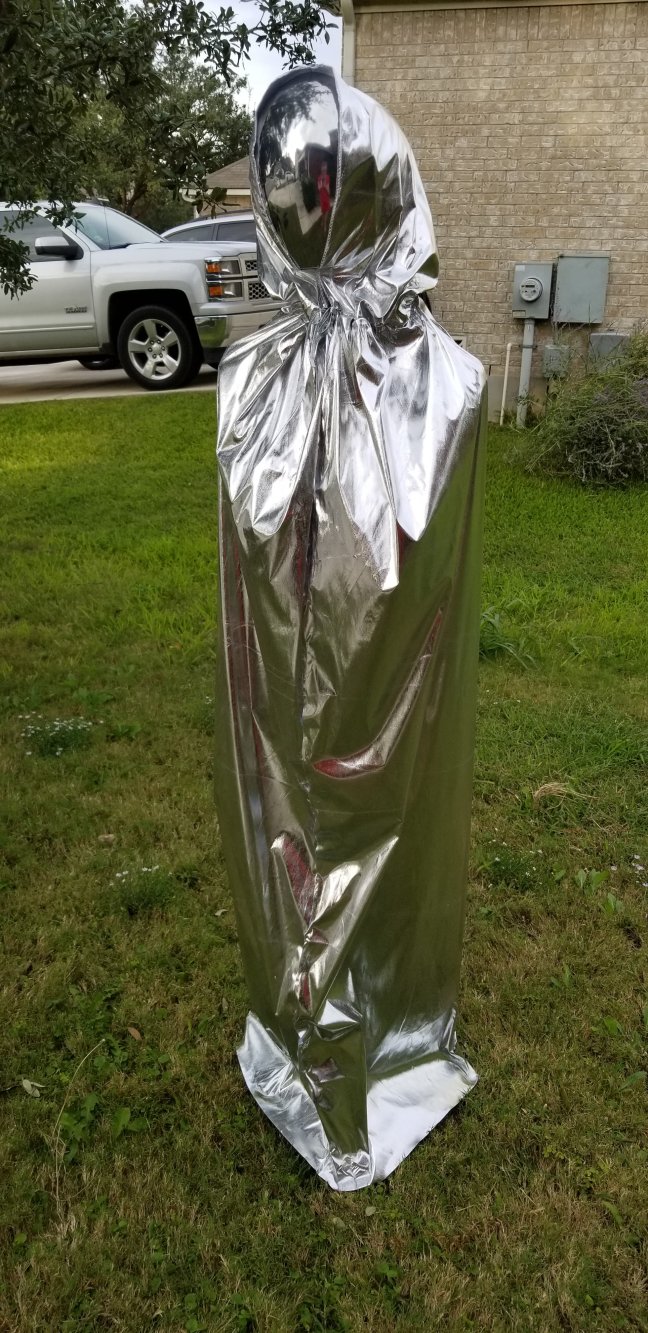
With just the Pvc pipe, this isn’t nearly as impressive. It doesn’t look too bad in this photo, but in person it looks really dorky. Why bother making something half way? Unless you want to make these in stages, over a couple of years, then this would be the fastest way to display the idea.
The next part of this project (after you accumulate your supplies) is the PVC support. This requires a trip to your local building supply store. If you are waiting on a sale for the dress form, you can work on this part.

This is half inch (the cheapest) 10 foot section of pipe. This is in the plumbing section. And bags of half inch 3 socket tees of 10. Why buy a bag of 10 when I only need 4? At my local Lowe’s store, the ten pack is $2.65. A single tee is $2.32. There were no bulk bags of cross pieces. The individual cross pieces were $1.50 each. I bought the bags of three-socket tees, but only because I was on a very limited budget (the grand total for each of these Faceless Aliens was about $19. I bought the supplies in September, during Halloween sales, with plenty of time to ship them) and I had zip ties. If you don’t want to go through this second step, to jerry-rig this together, buy the cross pieces in the amount you will use. For me, I wanted to spend as little on this as possible and I have a giant bag of zip ties (thanks to my hoarding husband.)

Zip tying the support for the head. If you want a simpler way to do this: buy the 4 socket PVC cross ➕ piece. I just did this to save money. I have multiple projects going this year, and over several projects, every penny saved really adds up!


Measure the length of the neck of the cape, to a little before the bottom hem. I am using landscape pins on the cape’s hem. I needed that little extra to have room to anchor it.
Cut your main length. This is what goes over the rebar and is what you are attaching the PVC joint to. It’s basically the body and legs of your alien.
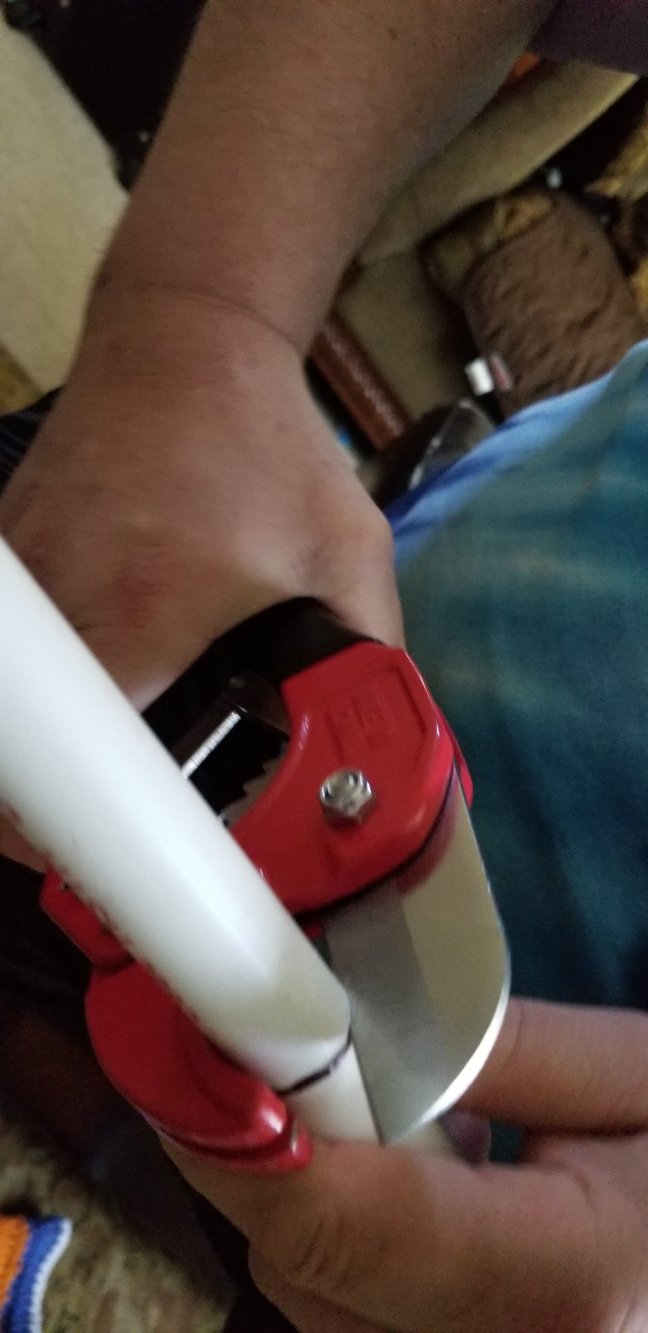
My hubby cutting pipe for me. A PVC pipe cutter is super handy! ( You don’t need help with a scissor pipe cutter, he was just being nice!) You could also use a saw, but the pipe cutter is much easier. They also sell a rotary, pressure cutter for this purpose, but again, this scissor type is super easy to use.
Attach your cross piece. You don’t need to worry about glue. Pipe glue is super messy (you can stain your skin purple and it won’t come off for a week!) and this will stay together, for this purpose, without it.

Again, buy the 4 socket cross piece, if you don’t want to be super frugal and just use zip ties with your excess pipe, like I did. Make sure your pipe elbows are the same diameter as the pipe you bought!
Cut your shoulder pieces and attach them. Cut your neck piece and attach it. If you are going to make a dress form support, like I did, keep the shoulders shorter as the form needs to fit over the PVC and the pipe “shoulders” are really just there to hang the packing tape form or bubble wrap form on. If you are using bubble wrap without a dress form: cut the shoulders a little longer than you think you’ll need them to be. You can always go back and cut them shorter. Use the cape to estimate how wide you can go, while still being able to completely close the cape over the form.

Attach the head. A few years ago I bought a bag full of styrofoam spheres. That is what I used for this project. This is the cheap/quick version for the head, especially since I already had them. You don’t need an actual face for this because you are using the mask over the sphere.
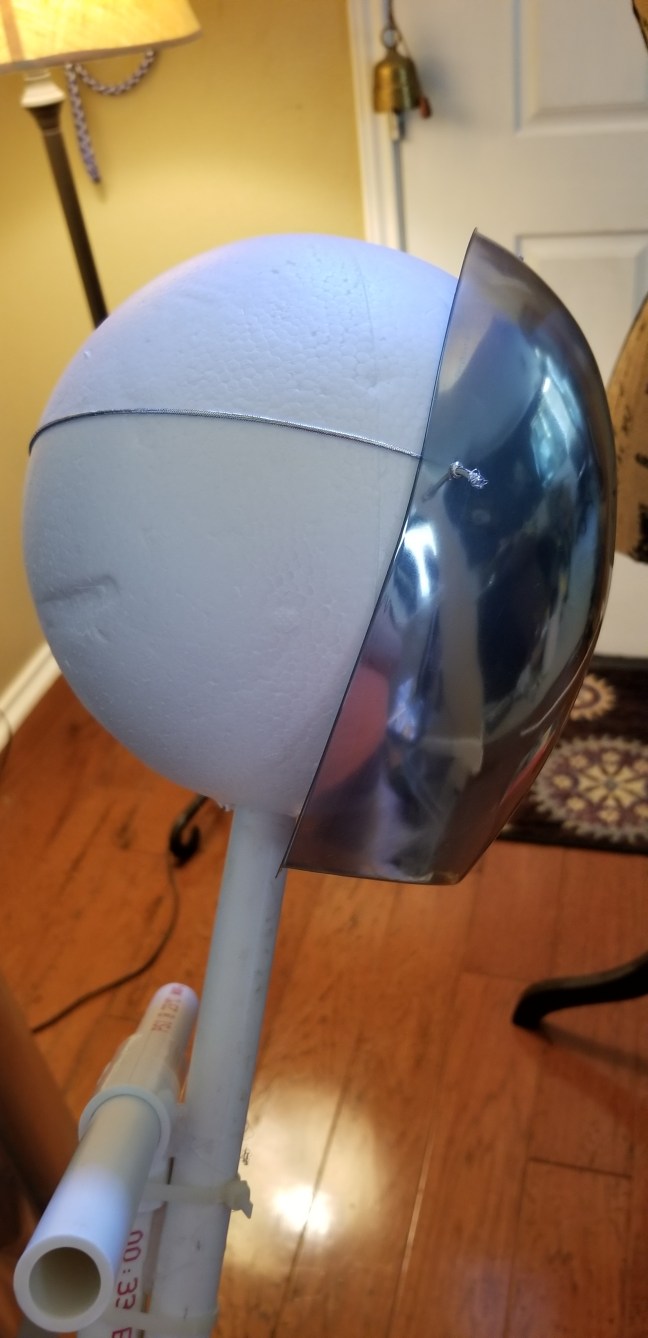
Some options here are to get a Styrofoam head. Hobby lobby usually has these in the back of the store. They are NOT with the floral foam. Another option is to fill a bag with excess plastic shopping bags, or other trash bags. The reason I chose not to go the bag route, is the head will not be completely stable like that, and may shift once you place your alien out in your yard.

I used a steak knife to dig a circular hole out of the foam for the pipe to go into. I dripped glue from my glue gun down into the hole and sat the “head” onto the pipe.
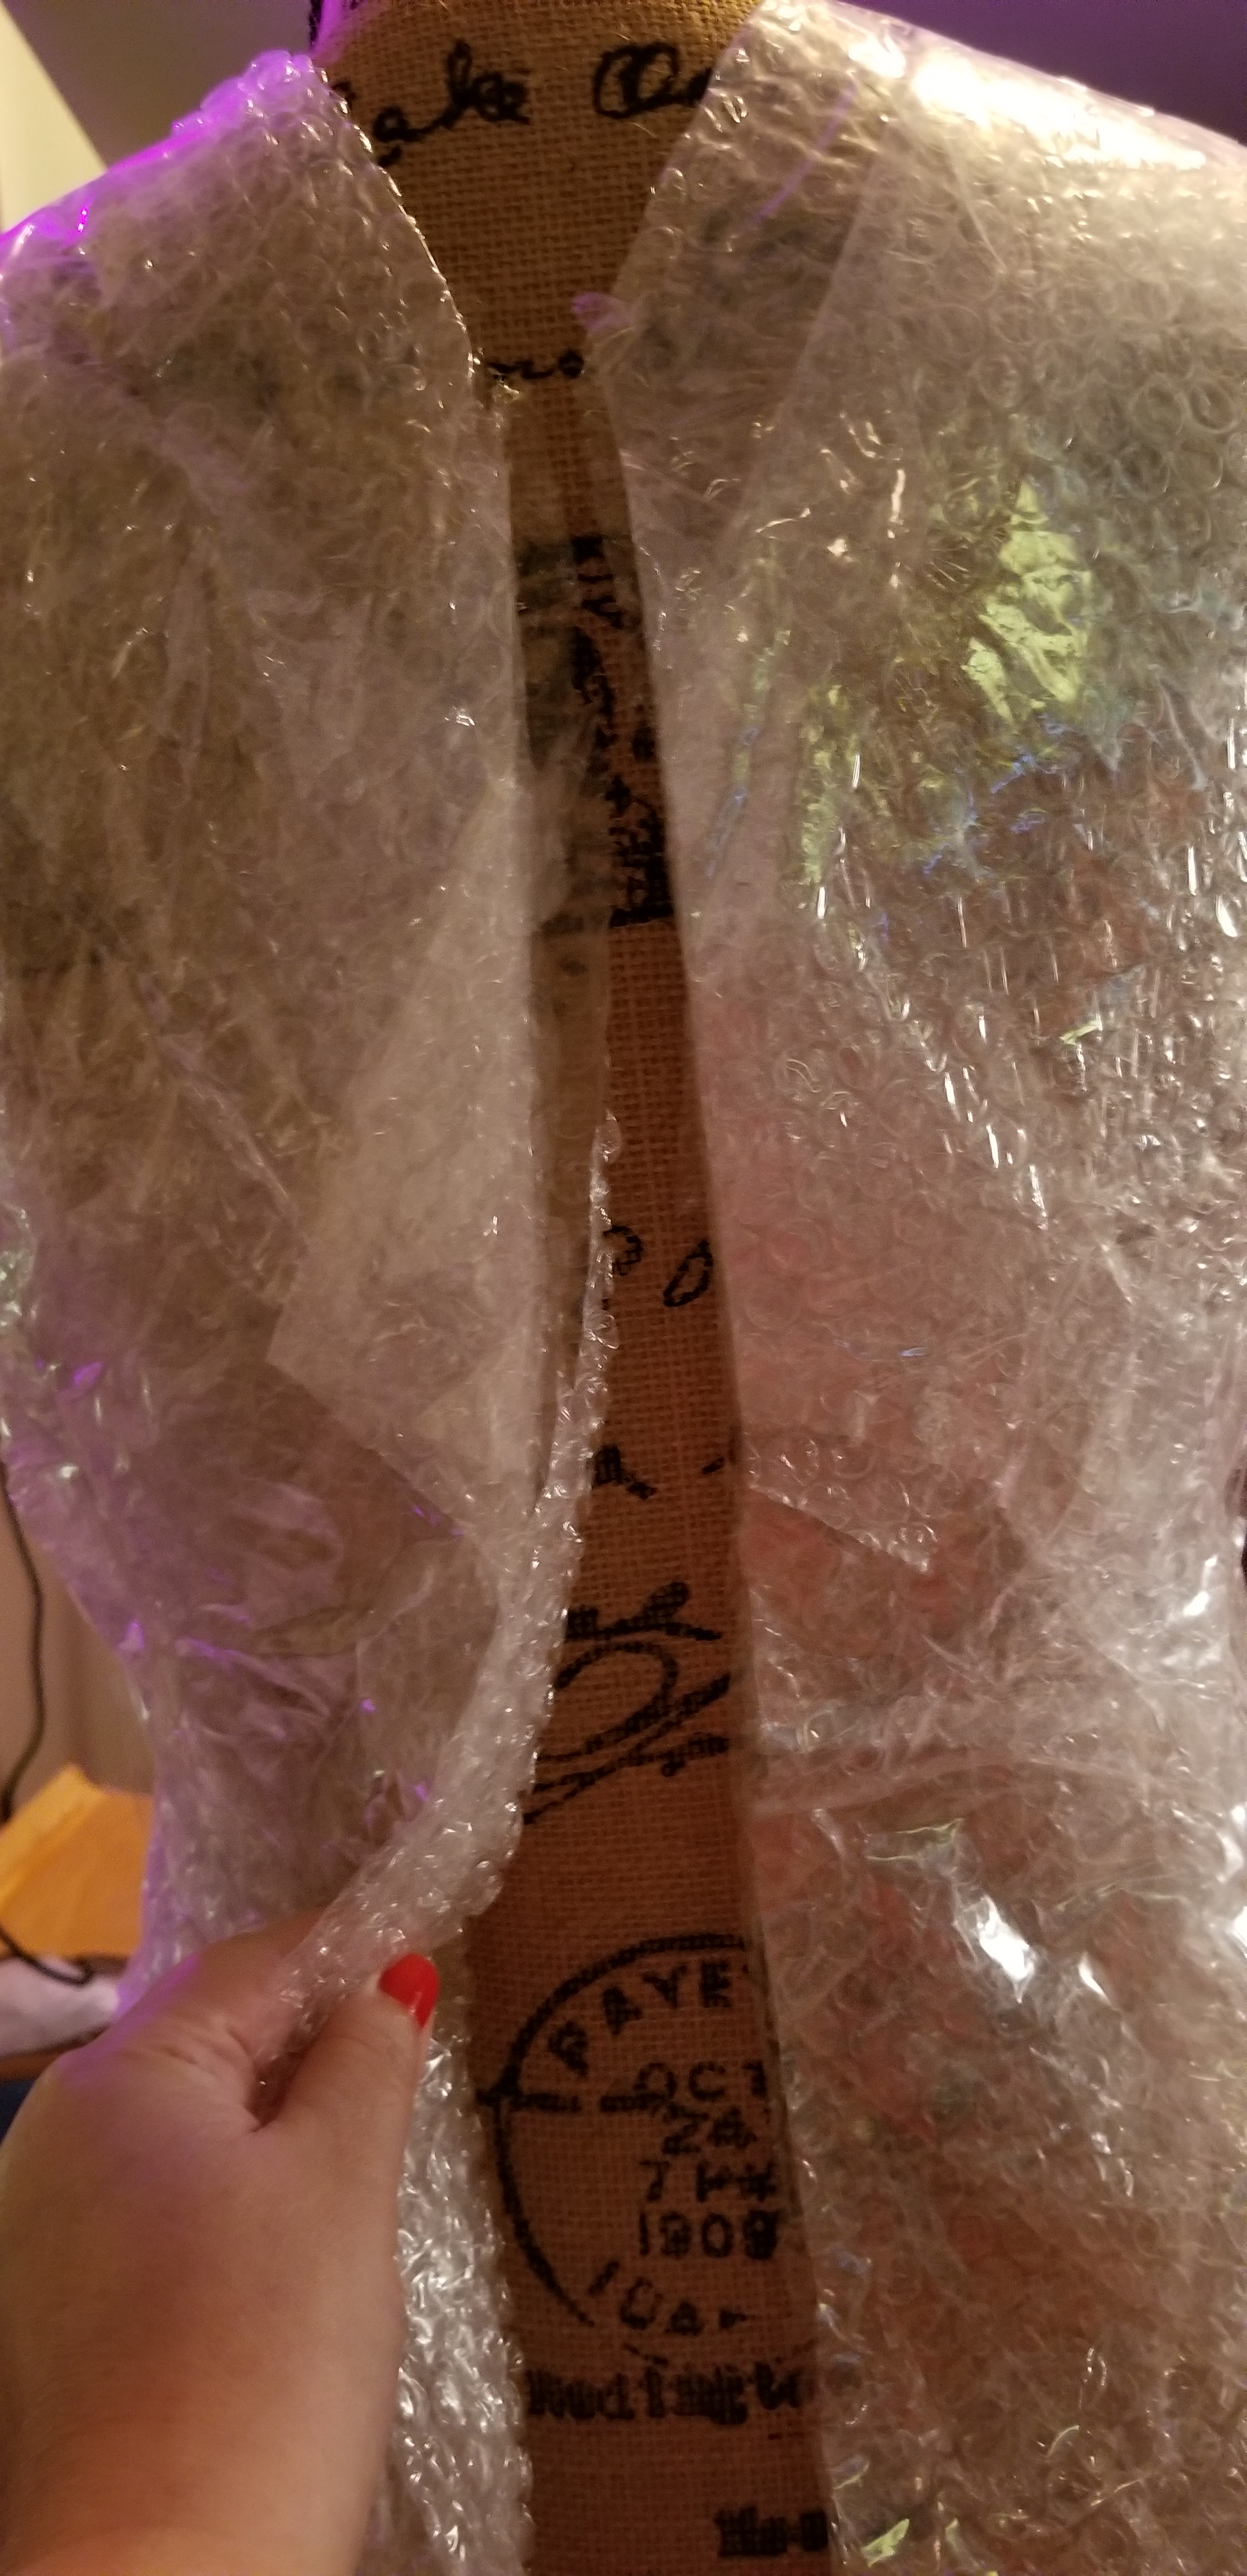
Next, I chose the option to make a plastic form from packing tape and plastic wrap. I got the dress form for half price a few years ago at Hobby Lobby. They have weekly coupons. Don’t buy stuff if it’s not on sale! I use this form every year for Halloween projects. It has turned into a very good investment. I usually put my packing tape ghost back over the form because it collapses in storage (no matter how careful I am in storing it). This way I can reuse my ghosts instead of starting over each year.
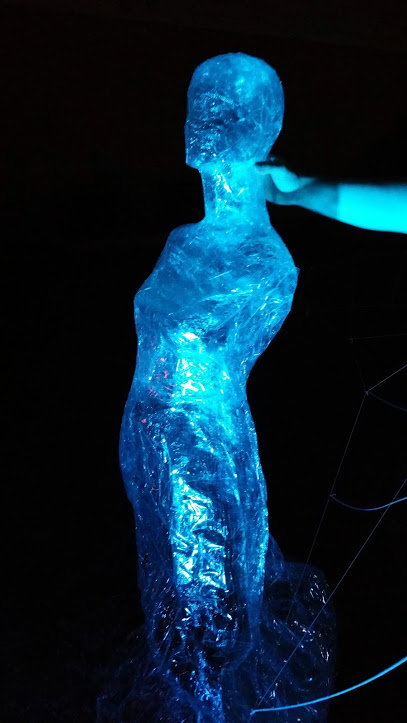

Because I was making a structural form, instead of a packing tape ghost display, I doubled the amount of tape and plastic wrap. I still used packing tape 1. Because I was already making another ghost for the yard so I had the supplies 2. I can reuse the supports for the aliens in the coming years and 3. If I ever decide I’d like to try a different approach to the support I could reuse the packing tape, support as ghosts. Frugality: My middle name! I used bubble wrap on the dress form for the 2nd, 3rd and 4th alien. It is much faster.
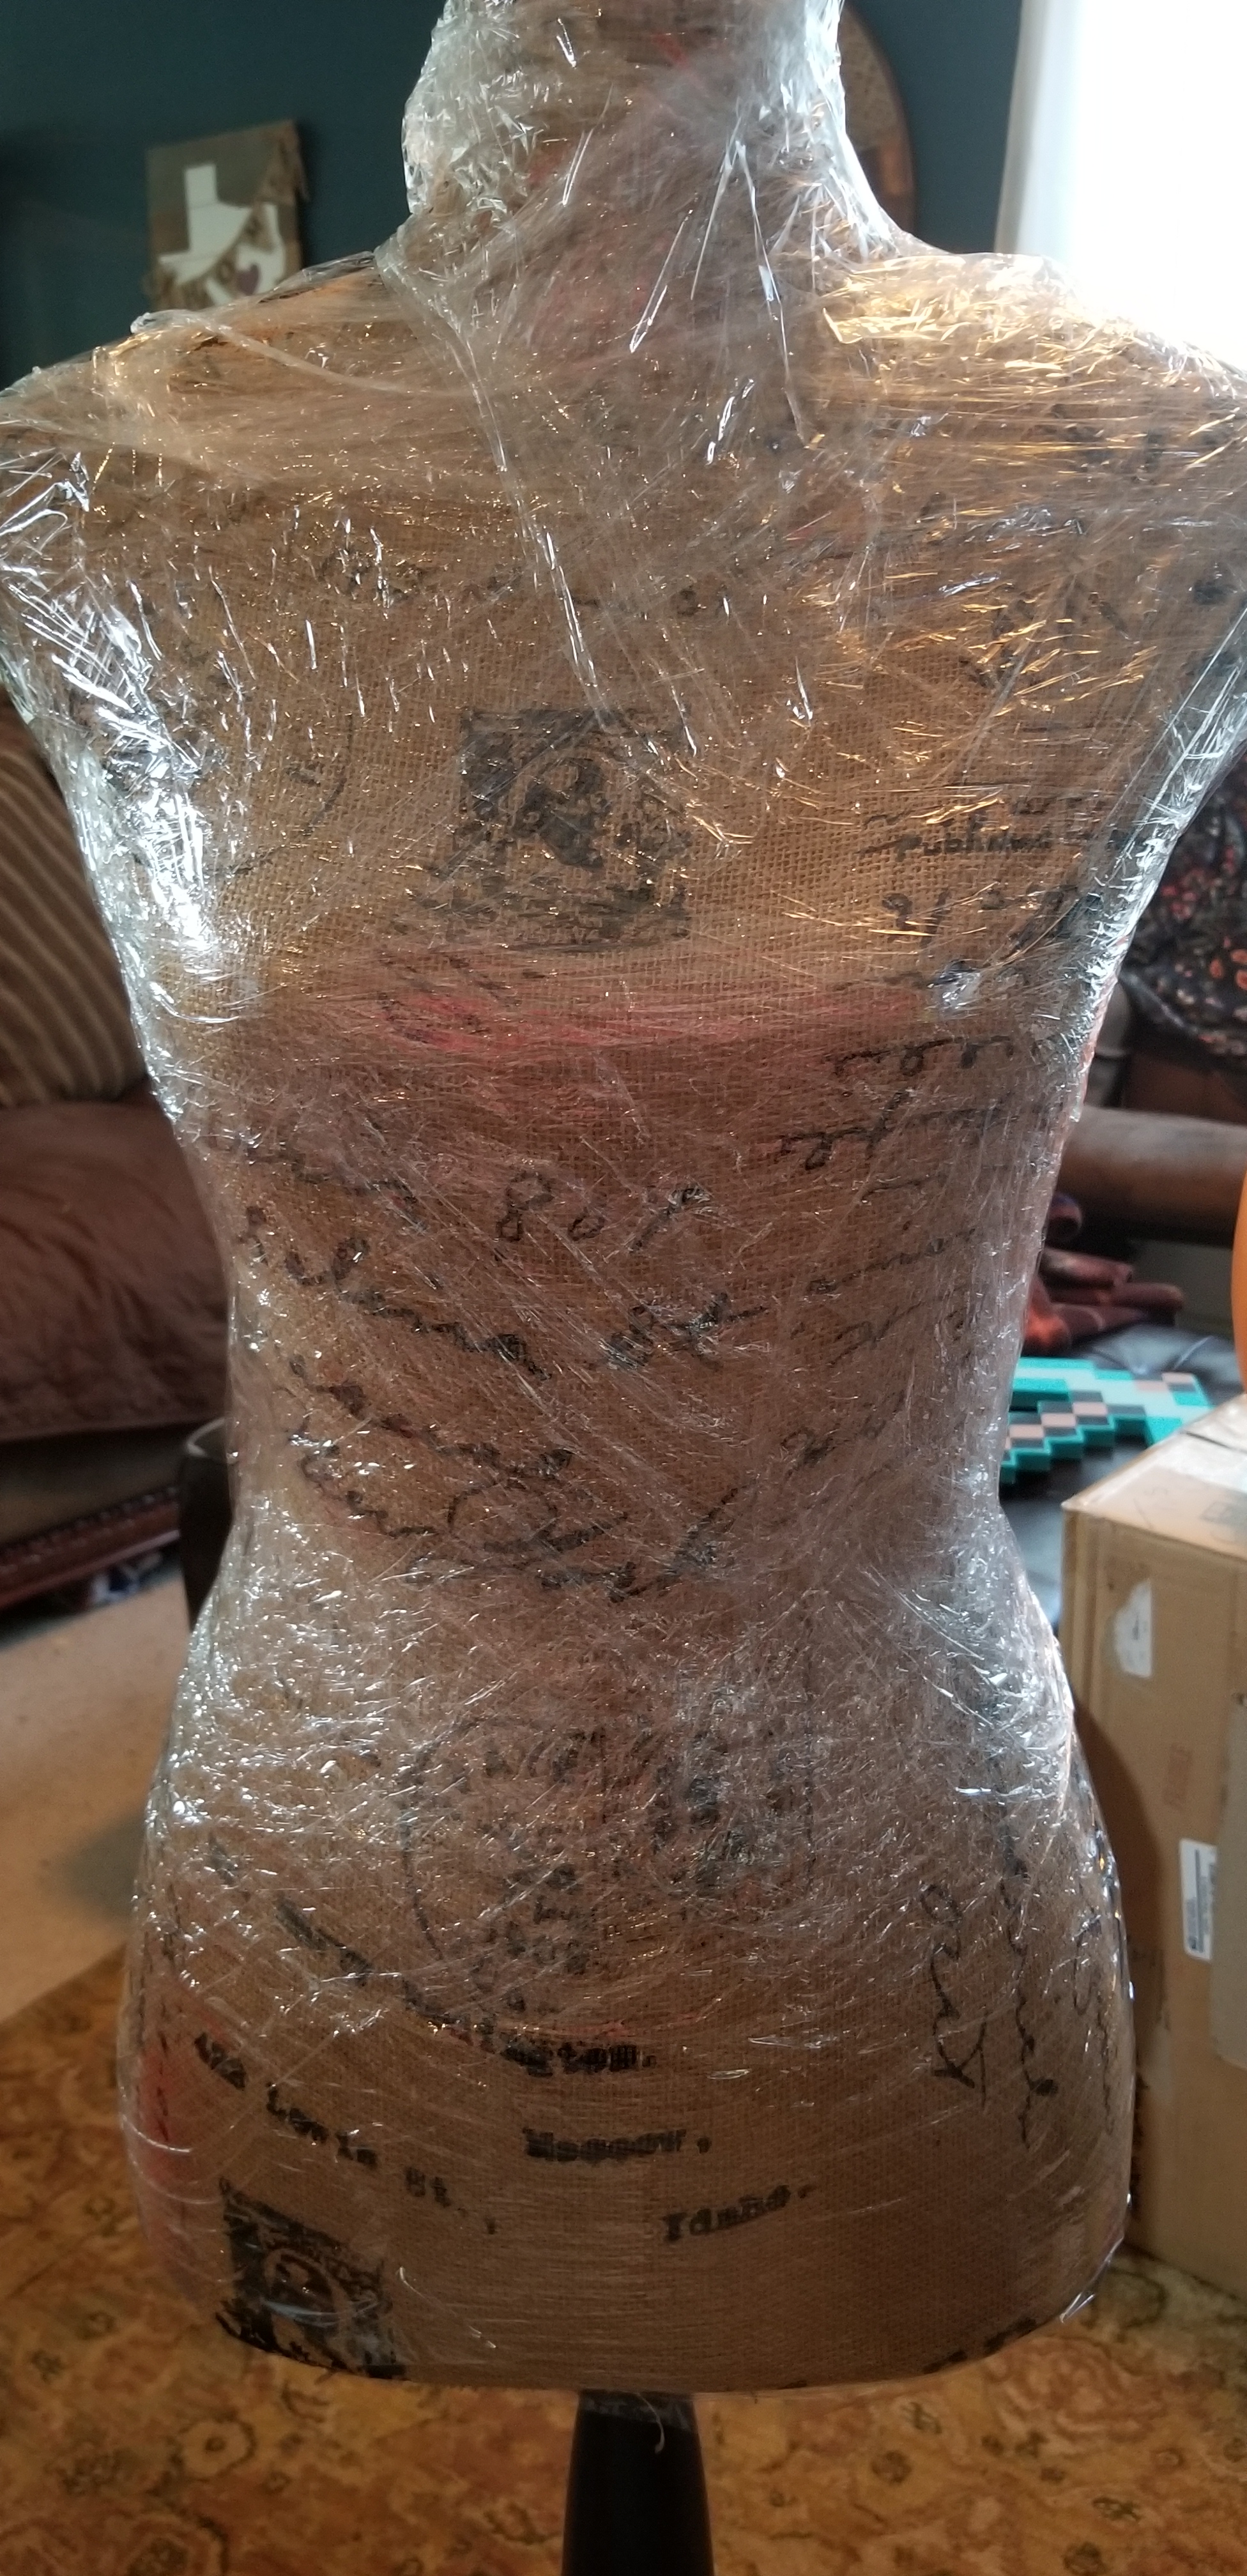
Wrap your form in plastic wrap. Tape the form with two layers. Wrap it again with plastic wrap. Cover your form with a 3rd and 4th layer of tape. Cut the tape covered plastic wrap up the back and remove the tape form. I really paid attention to the shoulders and upper chest, to help with supporting the cape.
With the bubble wrap: fold and tape the bubble wrap on the form following the curves. Cut back any extra that gets too bulky. Tape a second layer over the shoulders and chest. Roll lengths of bubble wrap (insert between the form and the pipe, around the neck) to steady the support on the PVC frame and tape in place.

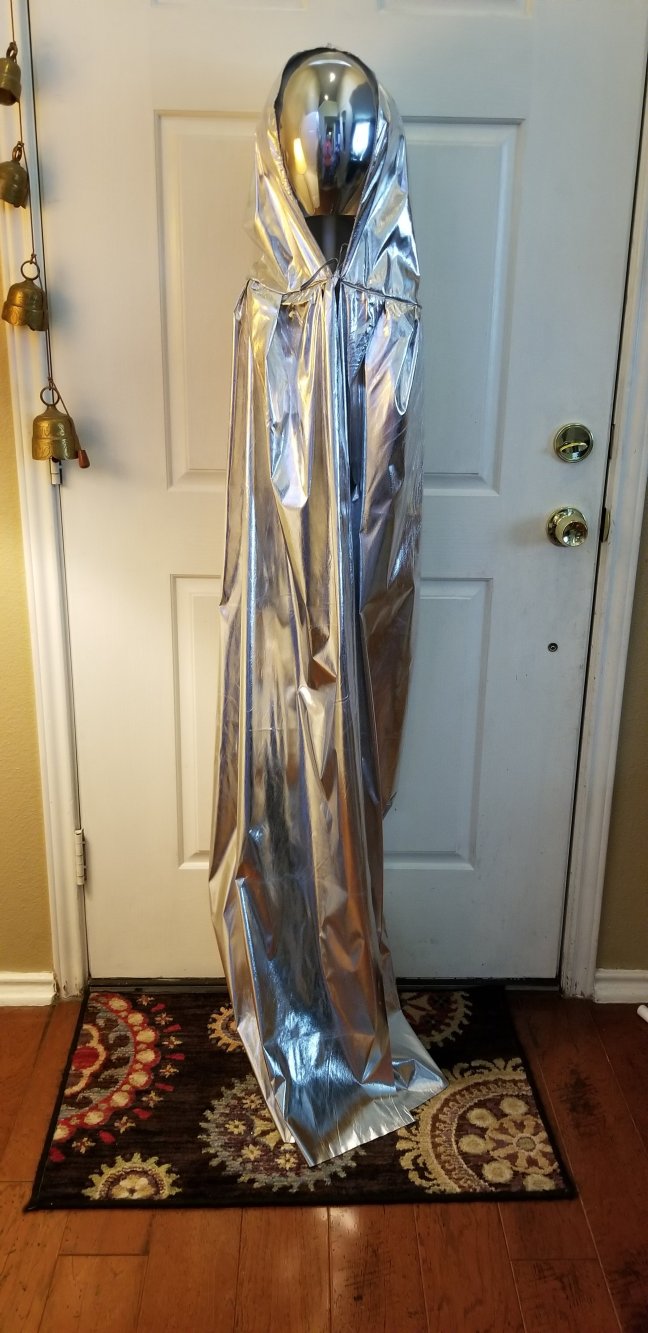
Place the tape form/bubble wrap form on the PVC support and tape it closed. You can glue or tape the packing tape form to the pipes, but I didn’t and it hasn’t been a problem.
If you haven’t already, put the mask on the head.
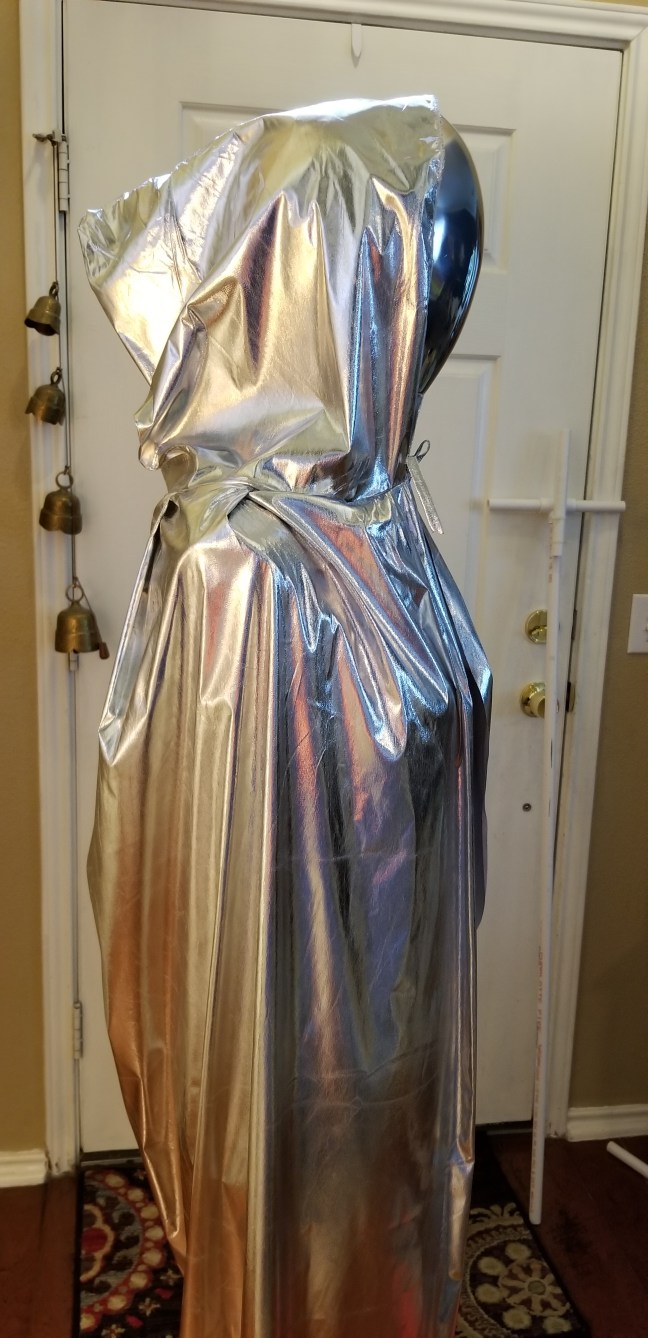
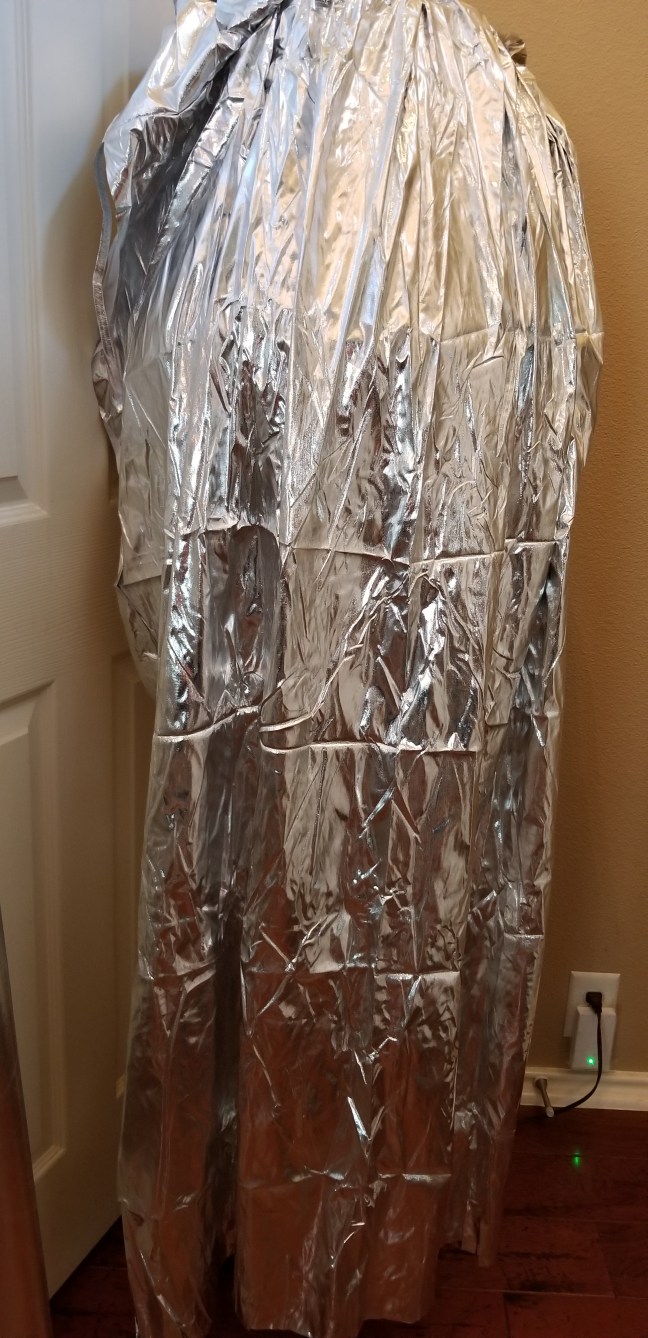
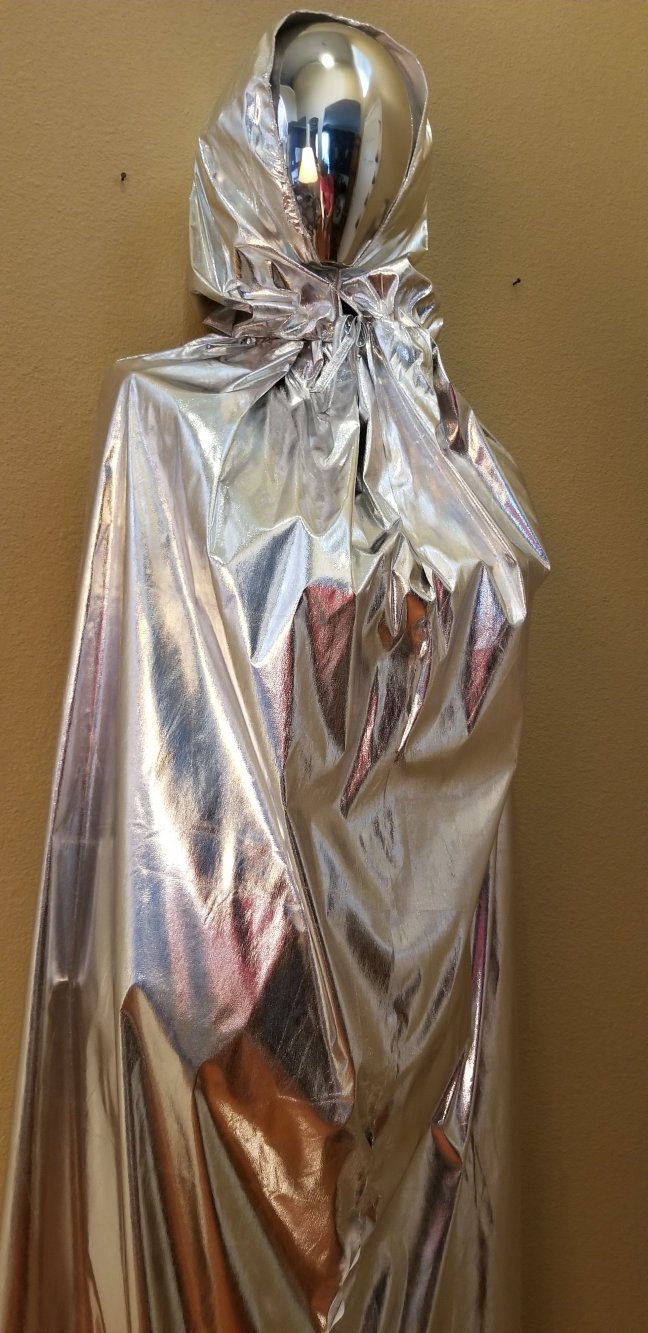
Drape your cape over the form. Use the hot glue gun to attach the back of the cape to the tape form at the neck.

Work your way around the neck with the glue gun and position the cape so that it is gathered evenly around the neck. Make sure you can close the cape in the front.

Glue the hood under the chin and work your way down the front of the cape. Closing the length of the front with your glue gun.
Take the rebar and pound it into where you want to display this. Leave enough out of the ground to securely place the pipe, at the base of your silver alien, over it. (I’d bury no more than half of the rebar, you are still going to have to pull it out of the ground after Halloween.)

Arrange your alien to face the direction you want it in. Place the hem of the cape as you like it. Get out your tape and put a couple of strips, over the hem, where you want to put the landscape pin (the tape should help keep the cape from ripping in the wind.) plunge the pin through the tape and the cape, and into the ground. Ta-da! One silver, faceless alien!
Because the cape is so reflective, I’m glad I used a dress form rather than just wrap the PVC frame with bubble wrap. It does make a difference in the finished project and it really looks like there is a person under the cape. It takes more time, but it’s super inexpensive. I don’t mind putting time into something if it makes a big difference. I do mind throwing big money at Halloween decorations! This is a great, cheap project that is scalable as far as time investment.

I’m really happy with how these turned out! Let me know if you make these, and tell me what you think of them! If you post your finished project, don’t forget to reference where you got the instructions!
Interested in more awesome, cheap Halloween ideas? Try these!
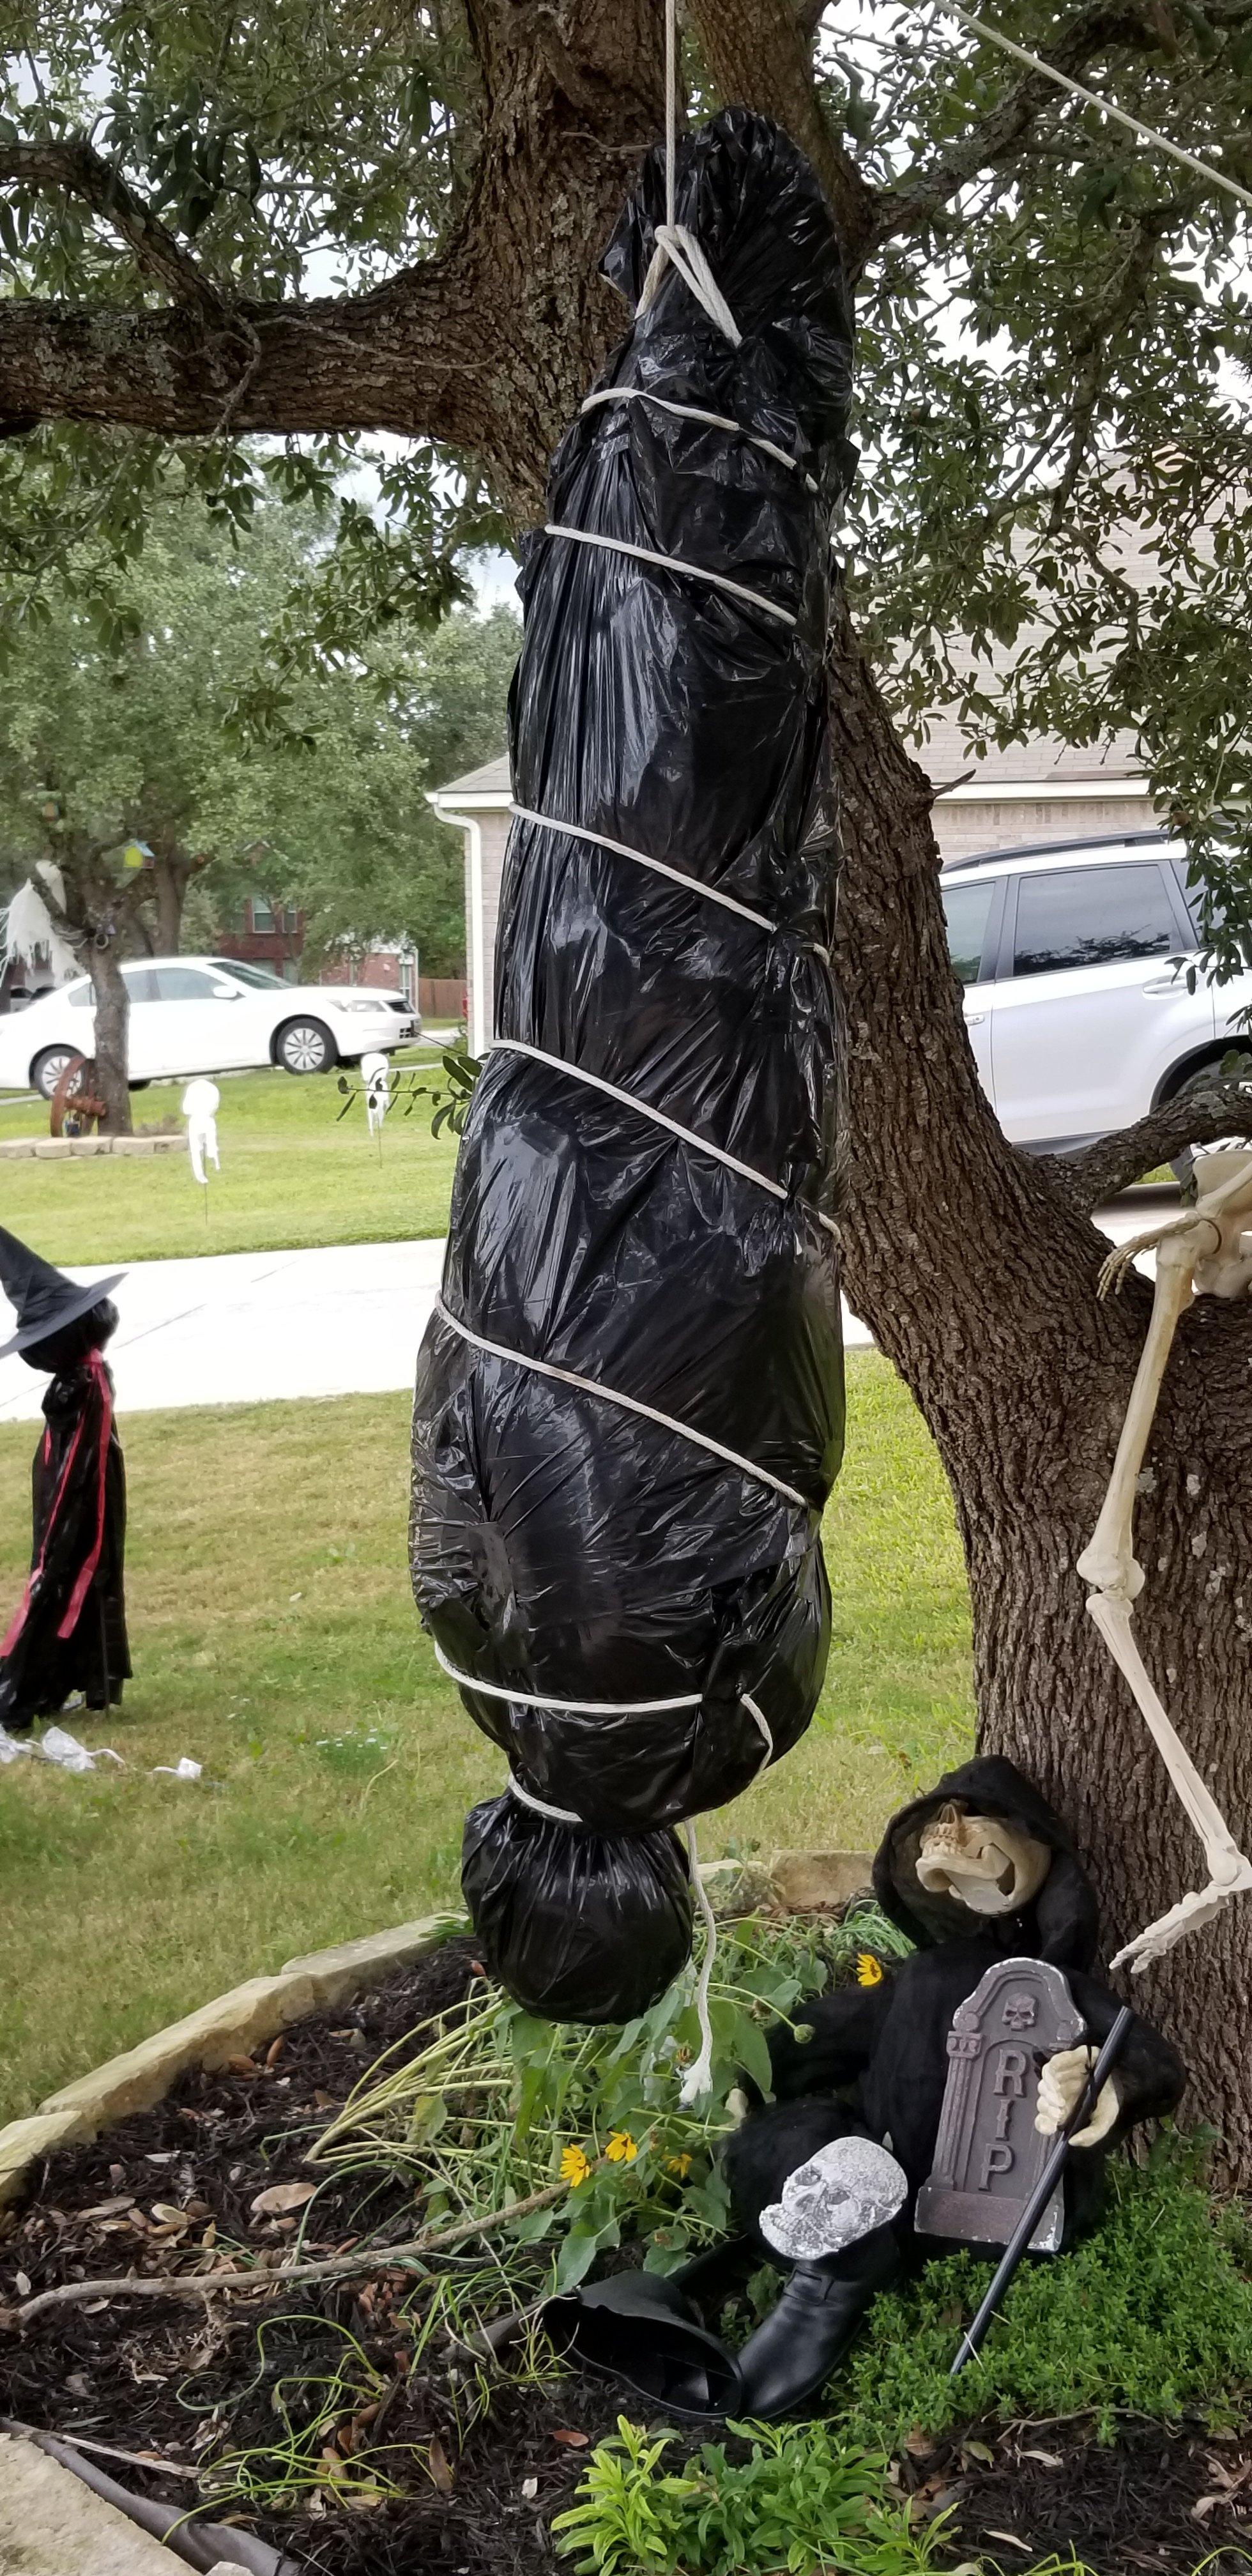
How To Make A Bagged Dead Body For Halloween


Last Minute Kid Friendly Halloween Craft Ideas

(As an Amazon Associate I earn from qualifying purchases.)
Discover more from Crazy Green Thumbs
Subscribe to get the latest posts sent to your email.

These are super-cool! Well done for not just copying something from a movie!
Thank you! They were fun to make!
Wow. You are creative! These are cool
Thank you! My neighbors all told me these are especially creepy standing out front. Exactly what I was going for! They’re fun to make. Thanks for coming by, I appreciate the visit!
My pleasure! Enjoy your Autumn