


This is a great time of year to plan and build raised beds. This is how I built my raised beds and I have given them no supplemental watering in the last two years of San Antonio heat. I’ve had bumper crops with almost no input outside of planting and occasional weeding! This has been a super fantastic bed for me and I will only build this kind of raised bed in the future.
2014 mother’s day raised beds:
I had a fantastic Mother’s Day!

My boys and my husband made me a cake!
The best part of the weekend? I got another hugelkultur inspired raised bed! Don’t know Hugelkultur? Learn more here: http://www.richsoil.com/hugelkultur/
This is the second year I’ve gotten a raised bed on Mother’s Day and I am super excited! The first one we built is here on my post: “Hugelkultur, Keyhole Gardens: Bridging Ideas”. We did this one a bit differently, but kept the main ideas we used on the original Hugelkultur inspired bed.

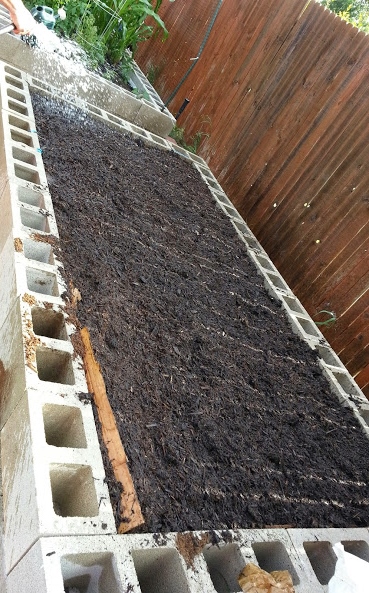
This is a cinder block bed. The inner dimensions are 6 by 10 feet. We lined it with cardboard. It’s two blocks deep. Filling this with soil to the very top of the cinder blocks will settle to about 1.5 cinder blocks high in the first season.
This is a dynamic bed and will need seasonal and yearly compost to keep it healthy. If you get several seasons in, and things just aren’t growing for you anymore, then you might need to refresh your soil. The structures inside the soil (fungal and bacteria layers) will form in the first season and will work together to make incredibly healthy soil. I always plant with low expectations right after the soil goes in. It will be fantastic the next season!
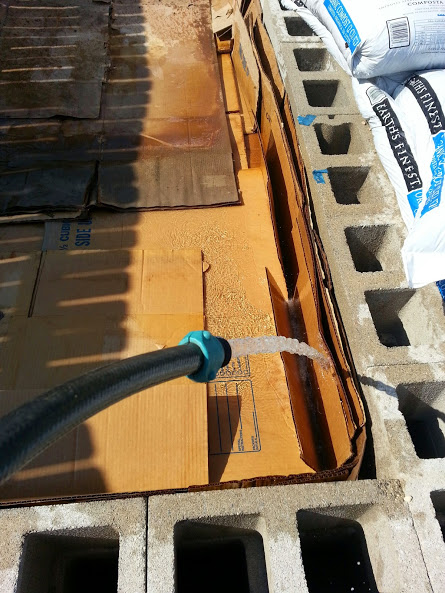
You need to wet this as you go. Cardboard and paper take a ton of water. It works well to step on it as you water. That will squeeze the air out and help your dry materials absorb the liquid.

There’s also a layer of packing paper. This is a great use of all the stuff you end up with after a move! We chose to add the wood chips again. These wood chips will eventually absorb water and act like a giant sponge. Through each new addition to the bed, make sure you wet it well. It will be impossible to wet it thouroughly later on.
Expect to have the giant grubs if you are in Texas. You can see my solution on my post “When Life Gives You Grubs, Serve Them Nematode Tea!” I’ve seen a lot of queries about giant grubs on search engines from people down here so I know I’m not the only one!
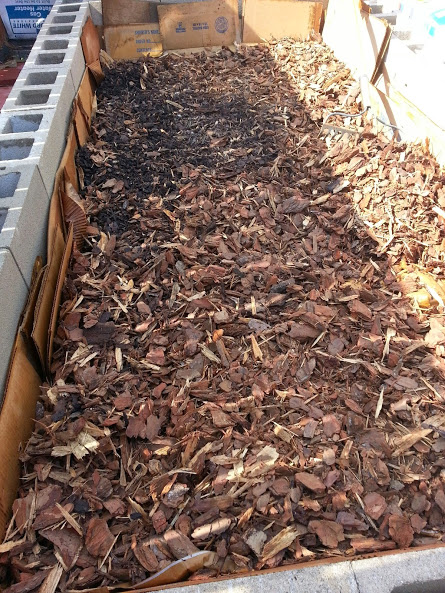
We used about 5 bags of mulch in this bed. I just bought the cheapest mulch I could find which ended up being pine bark mulch. The larger the chips: the longer the chips will last. Remember to wet as you go!

The next layer is compost. I don’t buy anything I haven’t touched. I also won’t buy anything that feels like there’s a ton of sand in it. We went to a local rock yard and were disappointed as usual. I’ve always done price comparisons between hardware stores and rock yards and have chosen hardware store bagged soil every time, but this rock yard had really poor quality soil as well. Bagged soil at Lowe’s was about a dollar less a yard and much, much better quality. I haven’t found good soil at Walmart or Home Depot locally, but you can certainly check whatever is near you and see if you have better luck. I skipped the hay in this bed. Since we’re in a severe drought: hay is not a cost effective option right now.

Your access to brands of bagged soil will depend on your location. If you see this stuff at Lowe’s, it is what I choose for amending. It’s a good price and a great quality soil. Don’t be fooled into thinking you need something that has a certain “type” of soil listed on the bag. Touch it and judge the soil by what you feel. This bag says “compost”, I call it: great soil. The only thing you might need to stay away from (as far as it being too rich) would be manure (composted or not). Watch your added Nitrogen levels with manure. It will burn your plants if you add too much and will be full of the salts they add as supplements to animals in feed lots.
Please refer to my post “Making Sense Of Old Sayings” to help you learn the importance of building great soil and how to recognize good bagged soil.
Don’t know if you are dealing with hot or cold manure? Read up on adding valuable natural fertilizers to your soil here: http://www.garden.org/ediblelandscaping/?page=201104-animal-manures
Here’s a site that explains why our rabbit is my favorite source of fertilizer: http://www.vegetablegardener.com/item/8156/rabbit-manure-in-the-garden

We added a bale of peat humus to lower the pH and help hold water. Everything down here (including the water from the tap) is basic. The water has such a high pH it will kill acid loving plants even if they are potted in low pH soil. I make my coffee in a coffee press. When I’m done I pour more water in, let it sit in the old grounds and then go water my gardenias with it. Be careful with the grounds themselves. You can easily kill a plant with coffee grounds…even acid loving ones. This is the voice of experience.
In the last bed I used another concept called Keyhole Gardening. There is a beautiful how to video from Africa on this concept and it makes the idea really easy to understand: http://youtu.be/ykCXfjzfaco . I tried this with the last bed I built. Over the year that it’s been installed: the feeder areas that I made with chicken wire have collapsed. This year I am going to use different, more permanent materials (three large pvc pipes with holes drilled in it for drainage instead of chicken wire) and add another aspect to it: worms! I got the idea from this blog: http://milkwood.net/2010/10/12/how-to-make-a-worm-tower/
So, I’m creating 1-3 permanent worm bins inside the bed. I may put one in and see how I like it and add others later. The site above calls it a “worm tower”. This is the basic idea of the keyhole garden which is set up to feed and water the beds, but with updated materials…and some red wigglers, which will do fine as a permanent outdoor worm bin in our climate. I love the new addition to the theme because: I have no interest in keeping up with feeding and emptying independent worm bins. I also was wondering how I was going to keep critters out of an outdoor bin full of wonderful kitchen scraps and yummy worms. We’ve already got armadillos in the yard tearing up areas looking for grubs. So far, they have stayed out of the raised bed.

Last year’s melons. I had a bumper crop but had problems with a family of opossums helping themselves to the ripe ones!
On the to do list: My husband is going to enclose the garden with fencing. I had trouble with opossums in my melons last year so I will probably end up using electric fence in conjunction with the fence my husband wants to put in.
This bed is cheap to construct, permanent, easy to maintain and I don’t have to deal with our crummy natural soil. I will be planting it this weekend.

I’ve learned over the years that leaving the cinder block holes open and not capping them or filling them with soil, makes an excellent hiding place for predatory insects. I can’t remember the last time I had insect issues in these beds, and it’s because of the spiders (etc) that find a happy home in the moist dark cinder blocks.
Watch for next weeks post! I will teach you a great way to water your raised beds and keep it from losing water to evaporation. Down here in the summer we have days over 100 degrees for weeks at a time, on top of water restrictions. They have promised an El Nino year which will hopefully end our drought but will bring torrential rains. Either way, this bed is going to provide us with a great area to grow veggies this year, and for years to come!
Want more information? The “Gardening Basics” tab at the top of this page will walk you through everything you need to know to start you on the path towards a successful gardening experience. The information is free and I’m genuinely interested in helping you succeed. Let me know if you would like more information on specific topics for future posts. I’m here to help. Good luck and go out and get your hands dirty!
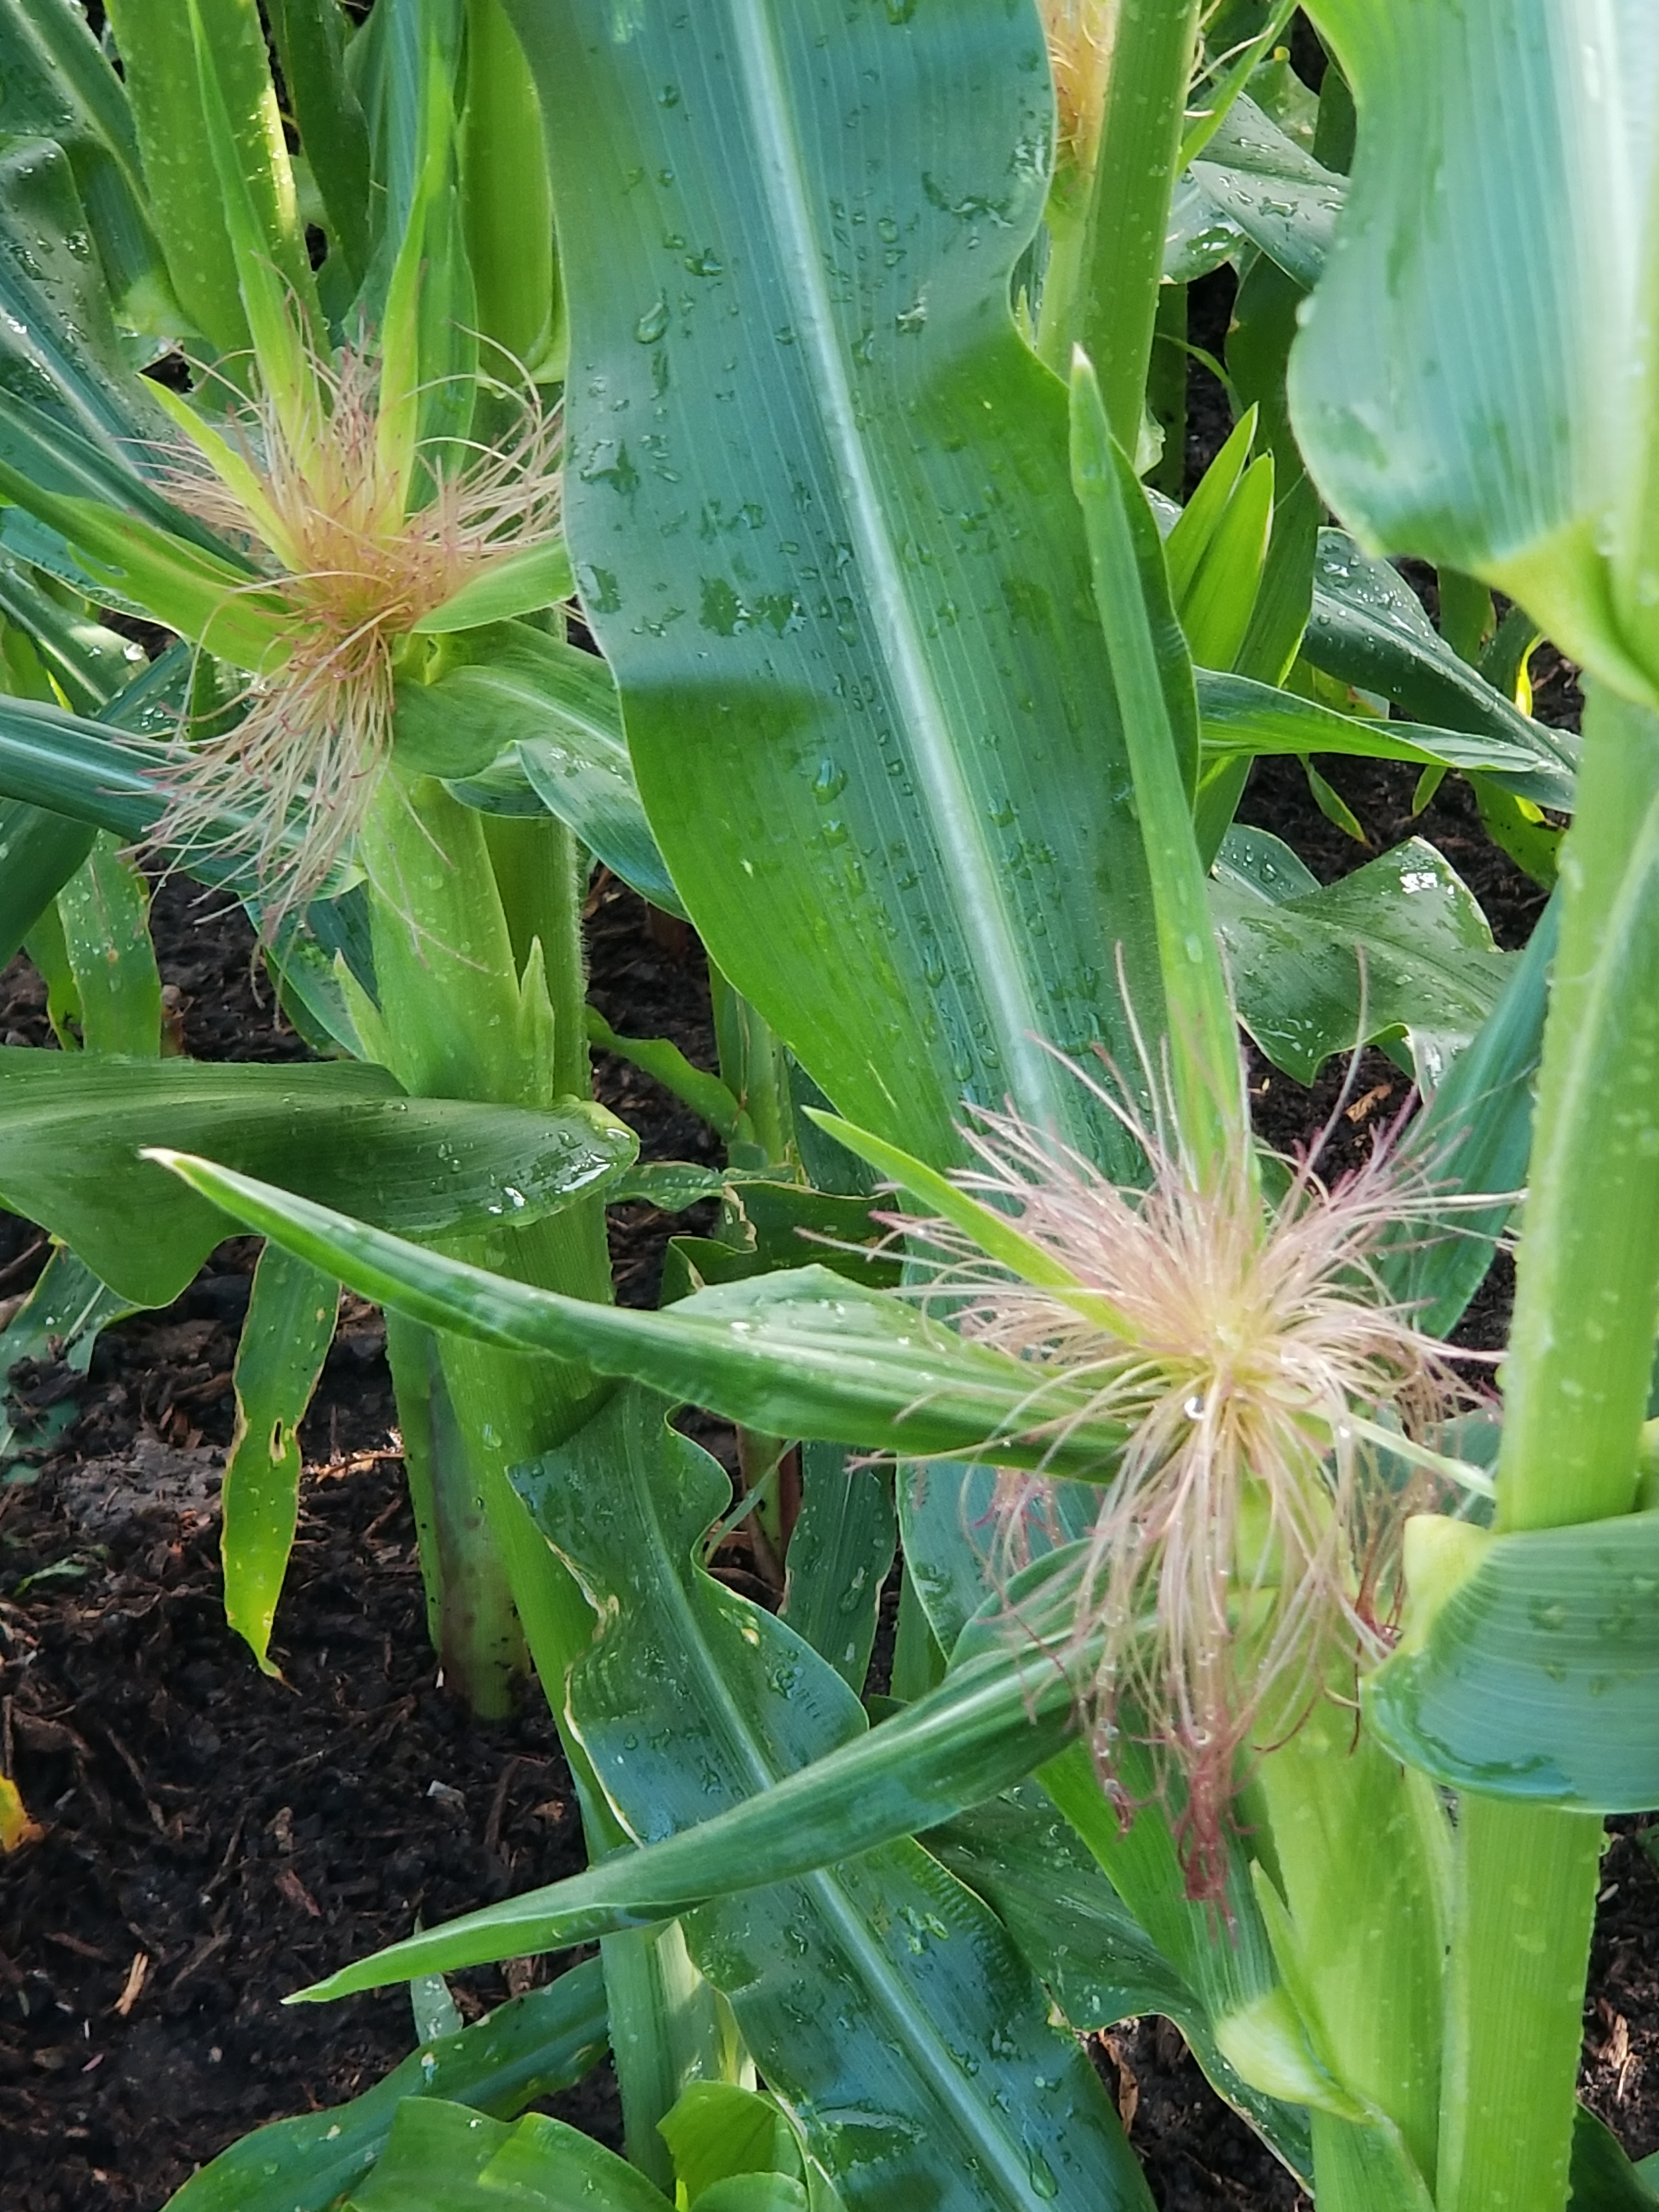
Update: it’s 5 years later and look at these beds! I will never build a different kind of bed. These are pretty much perfect!


Discover more from Crazy Green Thumbs
Subscribe to get the latest posts sent to your email.

I find cinder block useful too, not because I like raised beds, but because so much of the garden is very steeply sloped. I do not have enough stone for all the walls necessary. When I was in town, I disliked the open tops because that was where the snails and black widow spiders lived. They are not so much of a problem here. I did not think of the beneficial insects. There is plenty of forest out there for the anyway.
this is for your next post. I can not post a comment there:
Albizia julibrissin ‘Summer Chocolate’, Tradescantia pallida ‘Purple Heart’, Citrus X aurantiifolia, Ficus carica, Rosa spp.; I can not identify the bronze foliage in the extreme upper left corner, or the cultivars of the fig or rose. Nor am I certain about the Mexican lime. Perhaps someone else can do better with those.
This is for your next post. I can’t post there. I could not reply here either yesterday, so thought I would try again.
Albizia julibrissin ‘Summer Chocolate’, Tradescantia pallida ‘Purple Heart’, Citrus X aurantiifolia, Ficus carica, Rosa spp.; I can not identify the bronze foliage in the extreme upper left corner, or the cultivars of the fig or rose. Nor am I certain about the Mexican lime. Perhaps someone else can do better with those.
Wow! I’m impressed! You’re close with the Albizia. It’s a “merlot Majik” but there’s not many sources for it, so I don’t think it’s well known. A+ on the wandering jew. The citrus is a Satsuma. I can’t believe you even noticed the crepe myrtle in the back. I’ll know not to go up against you in a plant identification match! How fun! Thanks for the post and the sharp eye! As far as not being able to post, I’m not sure what is going on there. I can get into the comment form on my end and it’s turned on on my end. Maybe it’s something to do with that being a copy of the original post? I’ll have to talk to the WordPress guys. Thanks for letting me know there’s something wrong.
Satsuma?! I should have known that! I grew citrus trees in the early 1990s. Owari Satsuma was a rather distinctive cultivar. I still don’t recognize the crape myrtle. It looks more bronze than anything I remember.
Yes it is a black leafed variety. I believe they started with black diamond brand but those weren’t under any patent, so anyone could propogate them and sell them, so now they have newer named ones that they can control their work.
I am none too keen on crape myrtle anyway. It is too common here.
I enjoy them, but they’re definitely a southern thing! I grew up in Texas and in Georgia. Then I lived in the midwest. When I came back I could appreciate them. The dark leafed varieties with fire engine red or pristine white flowers are pretty showy and that’s why I have one in need of planting in that picture.
WHAT?! X2! 1. Fire engine red? Do you mean the foliage? They bloom only in white. 2. I missed one in that picture? How embarrassing!
Oh, I am sorry. I misread that. I thought you were talking about star jasmine! I am very familiar with fire engine red crape myrtle. The ‘Natchez’ white does not bloom as well here, but has the best foliar color in autumn. For some reason, ‘Natchez’ does better in the Los Angeles region, where there are not many options for foliar color in autumn.